Public release is still December. This build lets a part stand partly in front of what it crosses: a limb, a strap or a sleeve that is in front along most of its length and joins the body at one end.
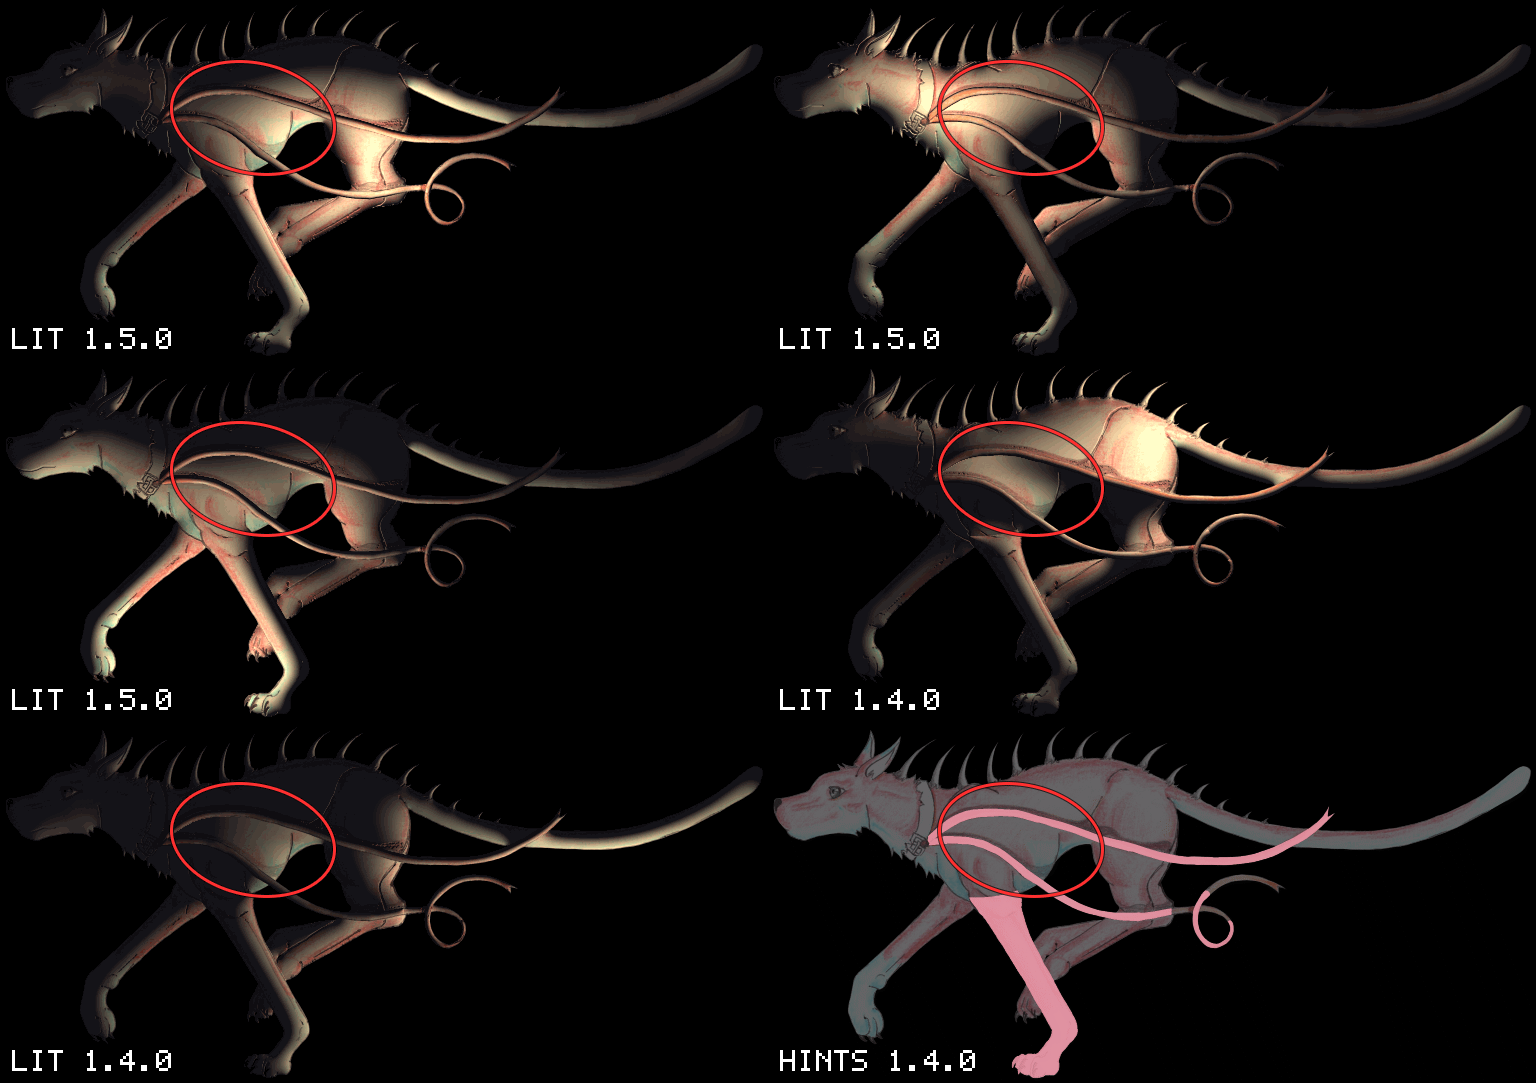
In front, at any strength
In front used to be all or nothing. A part was wholly in front of what it crossed, or it was not in front at all. Now how strongly you paint it is how far in front it stands. At 100% its edge turns fully away, as before. Paint it lighter and its edge turns less, lying more along the surface behind it, until at nothing the two are one surface. Fade the paint toward where a limb joins the body, and its edge fades with it.
The brush has a Strength setting in the options bar, for In front and for Flatten. Below 100% it paints toward that value, so going over stronger paint brings it down, and a second pass in the same stroke does not build up. Paint a region at 50% and part of it at 100%, and that part stands in front of the rest, which stands in front of the body: a hand over a sleeve over a chest, from one hint.
A hard edge in the paint is a cliff as tall as the change across it. Paint that fades gradually is a gradual change in depth. Painted at full strength with a hard brush, In front gives the same edge it always did.
totallynormalmapper.com/docs/hints
The body behind a strap stays one body
A strap across a body used to cut the body in two. Each piece was solved on its own, from whatever part of the outline it reached, so the flank between two collar straps could face down while the back above them faced up. Now the surface behind is solved first, carried on underneath whatever is in front of it, and the strap is solved on top. Where a strap trails off the body into empty space, nothing is assumed to be behind it.
The height map does the same, so the flank no longer sits a step below the back. You do not need to move straps, ribbons or thin limbs to a layer of their own to keep the body whole.
Hint layers keep their strength
A hint layer in a Photoshop or Aseprite file is now read by its pixels alone. Turn a hint layer down to see the art through it while you paint, and the hint still says what you painted. That holds in the import dialog and in the batch tool. Artwork layers keep their opacity.
The hint you are painting is on top
Where hint layers overlap, the one for the tool you have selected is now drawn over the others. Pick In front and its region shows above a Flatten fill. Pick Flatten and that comes forward instead.
Worth knowing
- A very soft edge is a fade. In front painted with a soft brush that fades over more than about ten pixels now reads as a gradual change rather than an edge in the middle. Use a harder brush where you want an edge.
- Faint leftovers count. In front paint at 10% or more, such as what a soft eraser leaves, now stands slightly in front. Erase it fully if you did not mean it.
- Layer opacity no longer weakens a hint. A hint layer turned down to make it weaker now counts at full strength. Paint it lighter instead.
- In front costs a little more. The surface behind and the part in front are solved one after the other, so a sprite with In front painted takes a little longer to solve.
For testers
If the app is already in your library, Steam will offer this build. Start it from your Steam library. A copy started some other way asks Steam to relaunch it. The About dialog should read 1.5.0.
The knight sprite is from rodrigodmoreira/nmap-generation and is used under the MIT License.