In SRPG Studio EX, you can now use pixel shaders. By using the massive library of built-in shaders, you can easily—and dramatically—level up your game's visuals. First, let's take a look at a standard map without any pixel shaders applied.
Unlike traditional maps, the tile size is now 48×48, and the default screen resolution has been upgraded. (Character sprites have also been scaled up, which is another new feature.) So, what happens when we apply pixel shaders to this map?
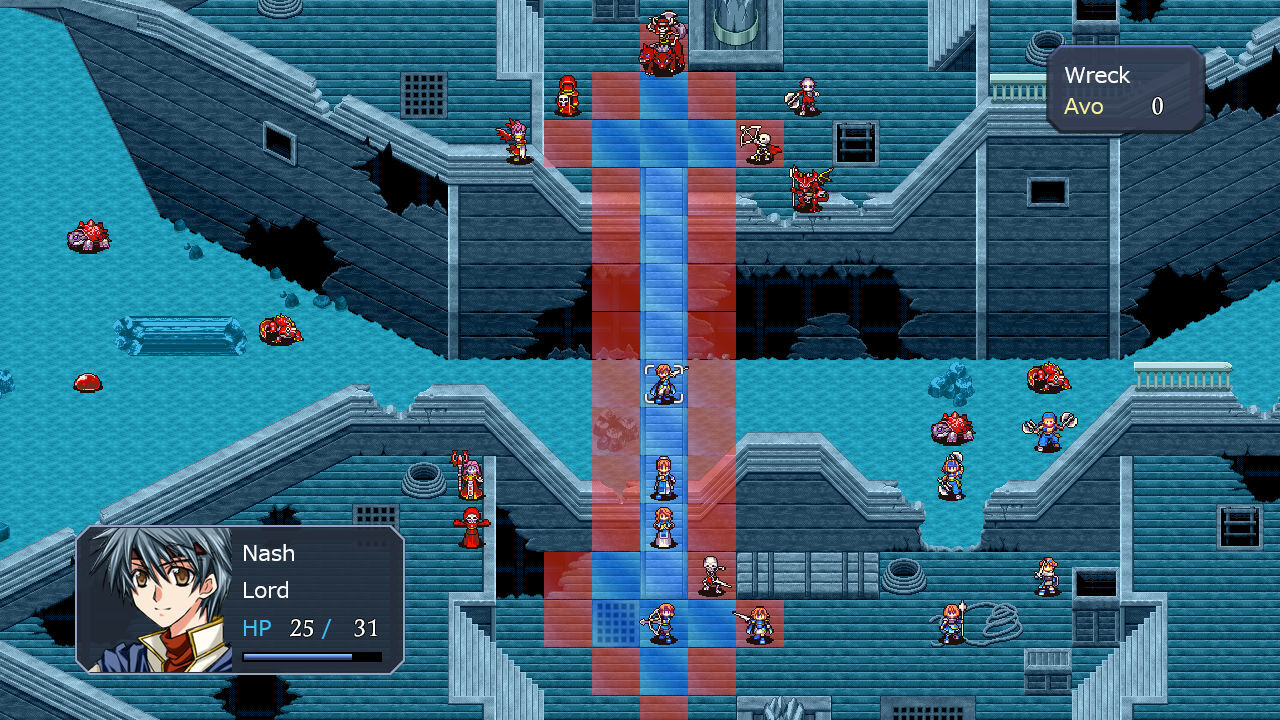
従来のマップと異なり、マップチップのサイズは48×48になっており、画面のデフォルト解像度が向上しています。
(キャラチップも拡大されていますが、これも新機能の1つです。)
では、このマップに、ピクセルシェーダーを適用するとどうなるのでしょうか。
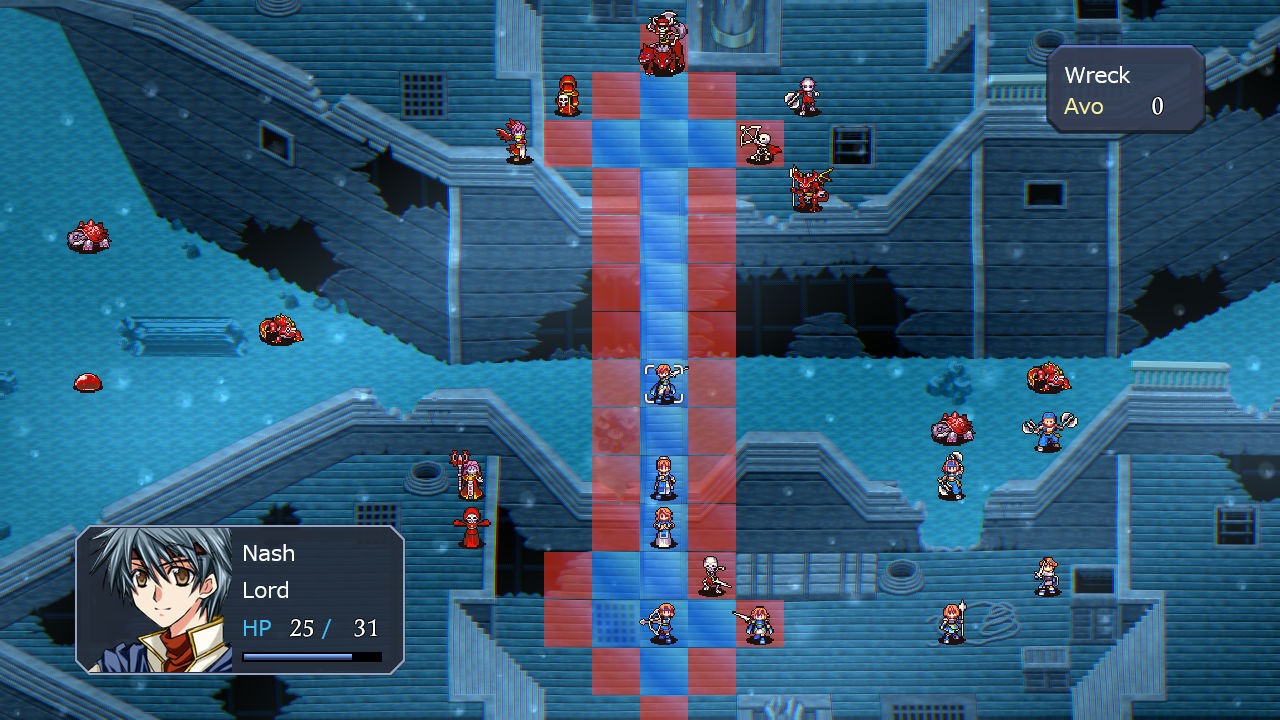
Imagine an underwater map with a bubble shader applied. Notice how the bubbles don't overlap the character sprites or windows. In other words, the bubbles are rendered only on the map layer.
To be honest, randomly displaying bubbles like this was possible in the old SRPG Studio using plugins. The real power of pixel shaders is that you can stack multiple effects at once. Check out the screenshot below.
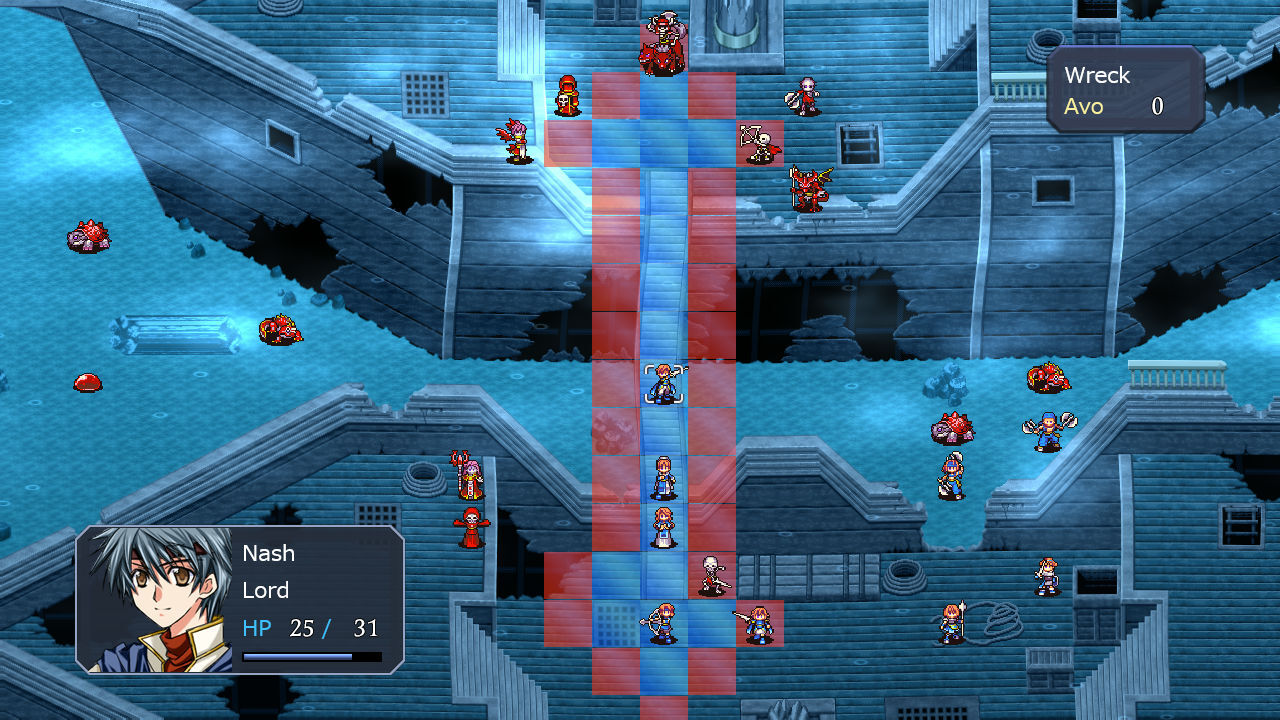
In this example, the pixel shader is handling all three of these simultaneously:
1. Displaying bubbles.
2. Making the map itself ripple.
3. A fog-like glow effect.
Number 3 is especially sick. The fog moves and glows randomly, making the map look insanely cool.
In the new SRPG Studio EX, definitely take advantage of pixel shaders. You'll be able to apply them just by selecting a shader from the "Map Information" dialog.