Build 25923064
buildAshfire Keep · public · first seen
Ashfire Keep 1.2.0 — Co-op, three new classes, three new maps, The Breach
Defend the inn with up to four people. Online with Steam friends, on the same PC with controllers, or mixed: two on one machine and two on another. And on top of that: three new classes, three new maps, a dodge for every class, an endless mode with a world ranking, 89 upgrades, six traps, weapon tiers, bosses with their own art, events that change with the map and the difficulty, an original soundtrack and an interface rebuilt from top to bottom.
Price. For the next 15 days Ashfire Keep stays at its current price; after that, the price goes up. If you already own it, 1.2 and everything in it are free.
Co-op
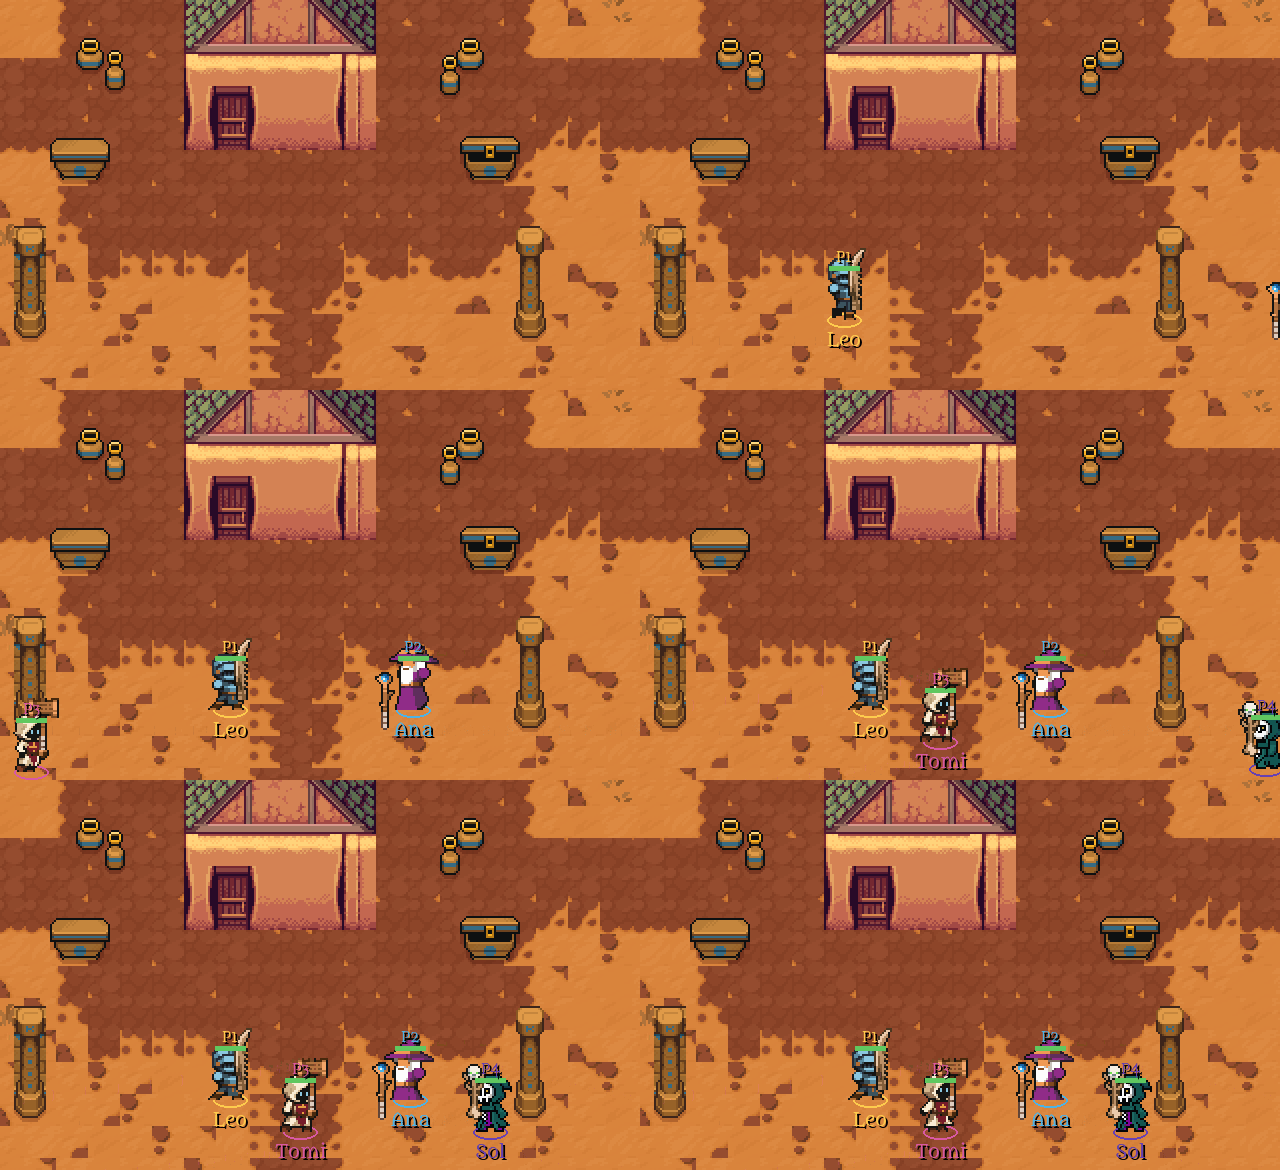
Online. A lobby among Steam friends: create it, invite from the overlay, and whoever accepts joins straight in. Everyone marks themselves "ready" and the host starts when all are set. One shared run for everyone: the host runs the enemies, the inn, the supplies and the waves; the others see it and play it, and enemies chase anyone in the group. Every player picks their own class and shows up with their Steam name, their colour (P1 to P4), their health above their head, their attacks and their upgrades.
Everyone builds. Each player sees their own list of unlocked defenses over a shared supply pool. Repairing, selling and moving work on any defense, no matter who placed it. Every move is confirmed with a sound and a banner, and if the spot is taken you are told on screen and no supplies are charged. Upgrades are picked between waves without holding your teammate up, and pausing pauses the whole run. Going down is not losing: you come back next wave; the run is lost if the inn falls or if everyone is down at once.
On the same PC. Up to four on one machine: player 1 uses whatever they are already using, and a button on another controller (or Enter) adds a new player; B / Esc removes them. Each with their own controller, class, colour and list of defenses, and the camera keeps everyone in frame. Every player levels up and picks their own upgrades, in turns ("Player 2 — Cleric"); act rewards are per player too. It combines with online: two on your PC and two guests. Each player picks their own aiming, automatic or manual, on their class turn. At the end, the summary shows one card per player (class, level, kills, damage dealt and taken, and their upgrades), with a single reward for the PC. Every player has their own card on the HUD with their health and lifelines, and if a controller disconnects the game pauses until it comes back (with A) or you choose to carry on without that player.
Scaling with players. Enemies per wave multiply with the number of players (4 = four times as many), and so does how many can be alive at once; their health and damage do not change. Bosses do not multiply but get +75% health per extra player. The supply pool and the defense caps grow +50% per extra player: less than the threat, on purpose.
Shared experience (optional). In the lobby the host chooses individual (everyone collects their own gems) or shared: a gem picked up by anyone counts for everyone, so whoever stays back defending the inn does not fall behind in level.
You can see what your teammate does. The effects of their abilities (the Cleric's pulse, the War Cry, War Stomp, the holy zones, the Intimidate and Dread auras, Soul Harvest…) show up on your screen at the same place and time. Their card in the HUD shows their class, name, health and their lifesavers (Adrenaline, Frenzy, Endure, Sacrifice) with the seconds left. Their charges, weapon glow, Focus marks, fury or streak aura and Second Wind also show on their character, and their lifesavers work just like yours.
Back to the lobby. When a run ends, the summary offers Back to lobby and everyone returns to the same lobby to play again. Main menu only takes out whoever picks it (if it is the host, the lobby closes for everyone). Banners tell you who came back, who left and when the host closed the lobby, and every player appears with their Steam profile picture. At the end, everyone sees their own summary and earns renown for the group's run.
Three new classes

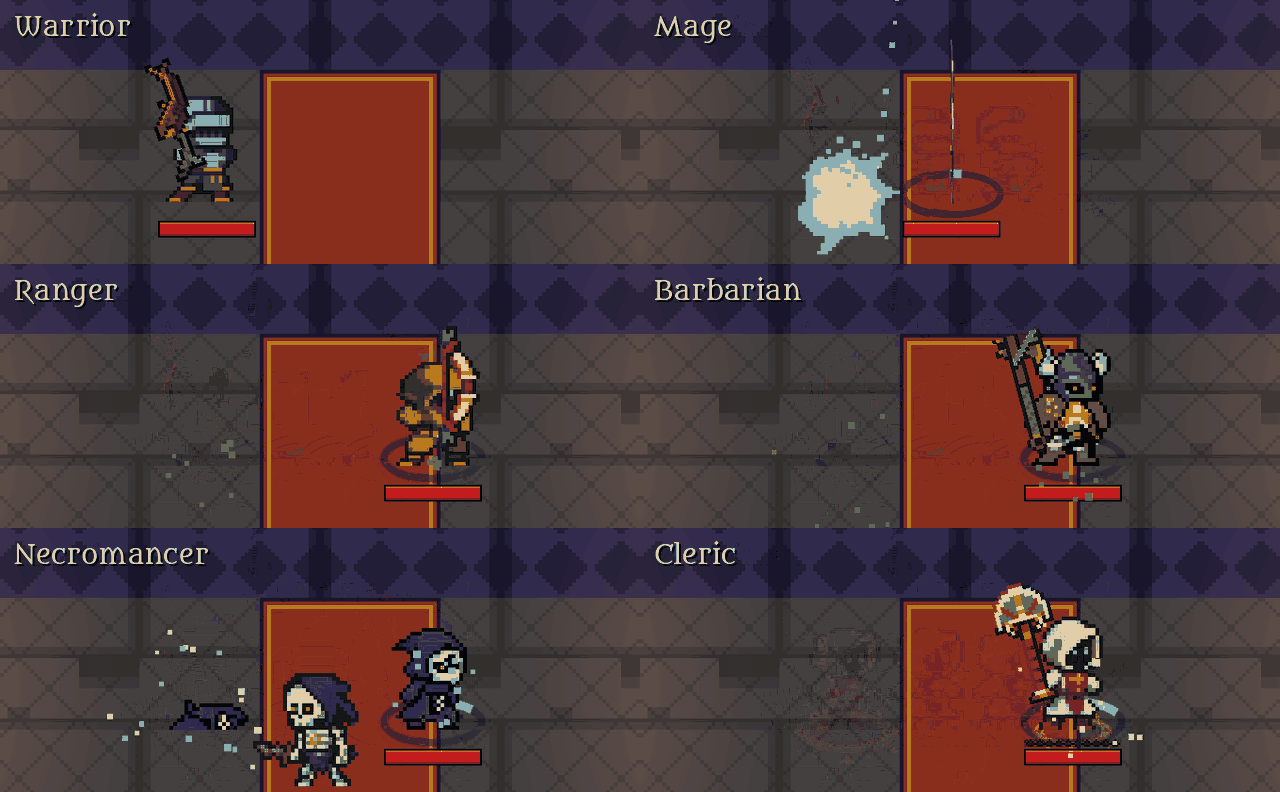
Cleric (mace; sturdy melee, consecrates the ground and heals the group), Barbarian (double-bladed axe; slow, brutal swings, less health) and Necromancer (bone staff; fast projectiles, fragile, raises undead that fight at your side). Each with its own art, idle, attack and death animations, victory challenge and place in the story.
They are earned by playing: the Cleric joins when you win Forest Village, the Barbarian when you win Snowbound Outpost and the Necromancer when you win Gloomspore Hollow, each with their own line and introduction. What you have already done counts: if you had it, you will find them unlocked.
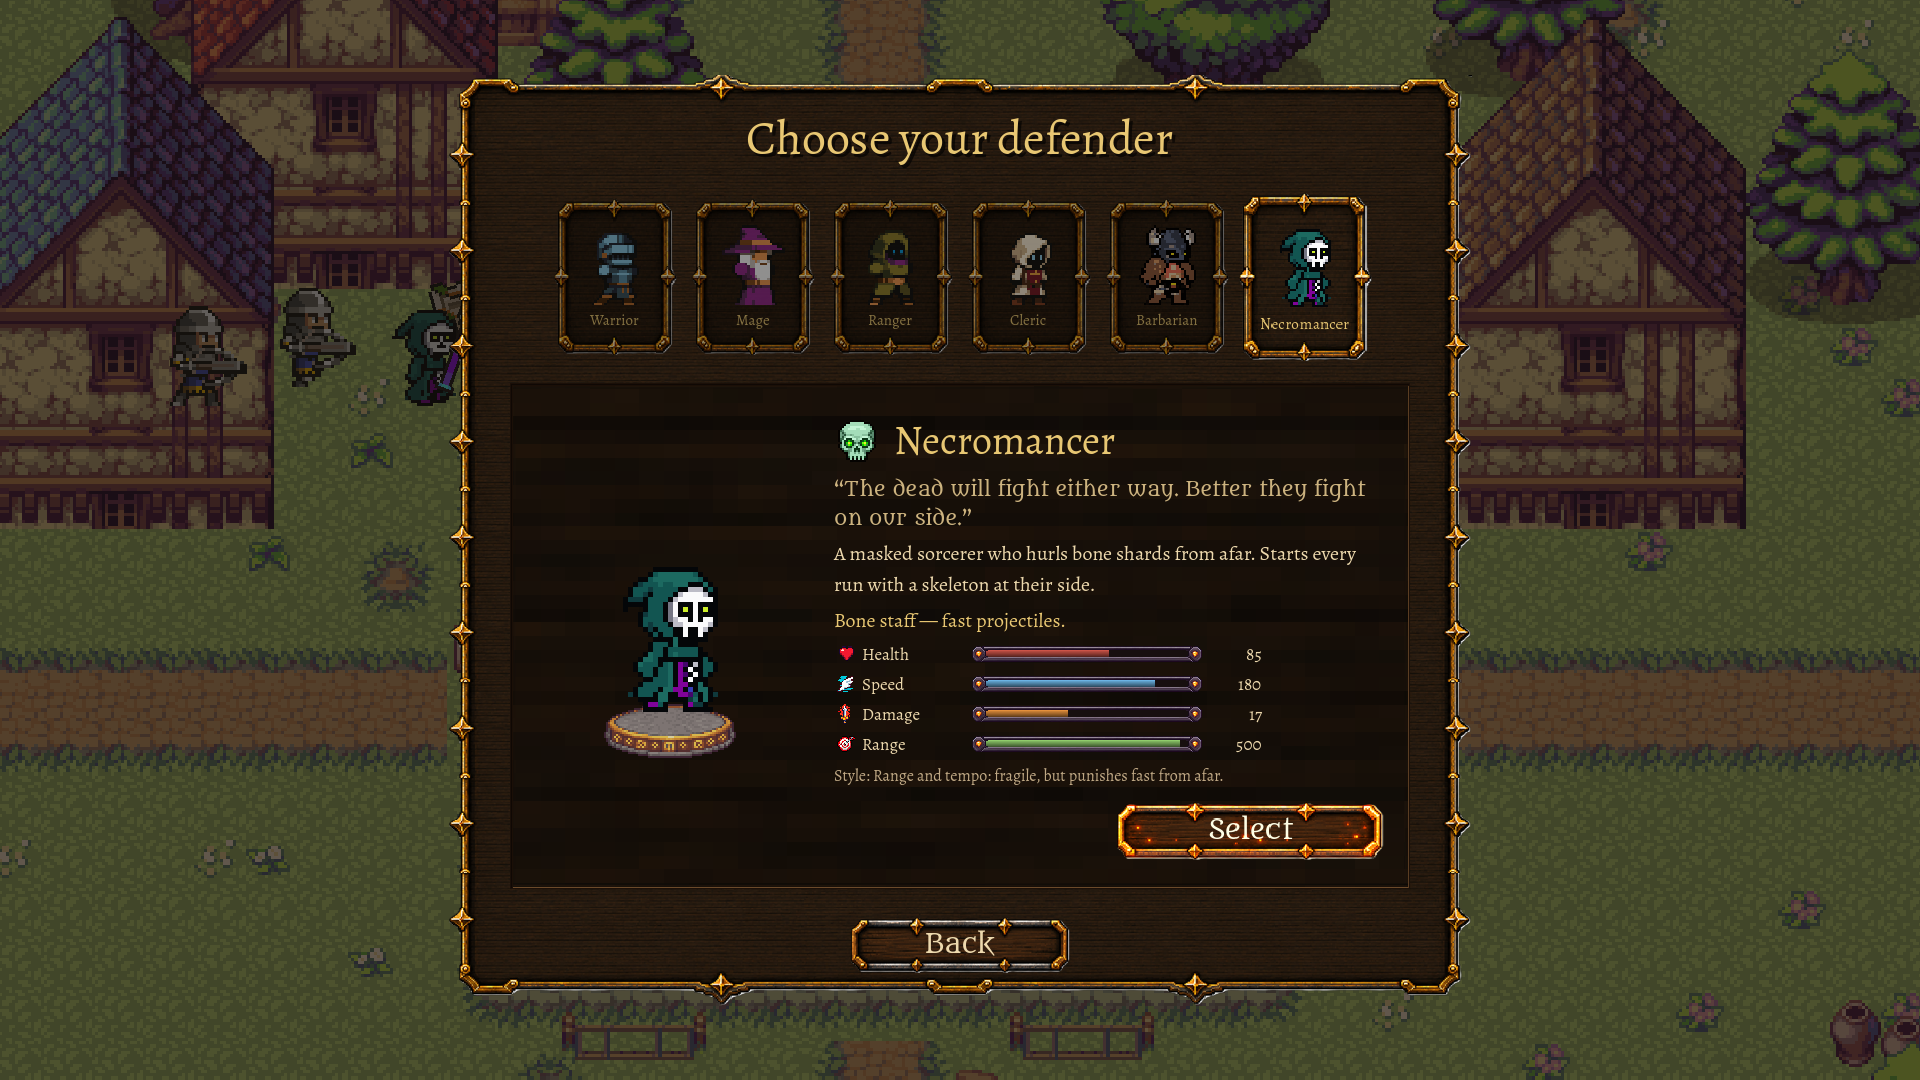
Class selection shows the full roster at the top and, below, your pick standing large on its pedestal, with their signature line and the stats as bars you can compare between classes. All six classes have an attack animation that also plays while moving, and weapons move with the striking hand.

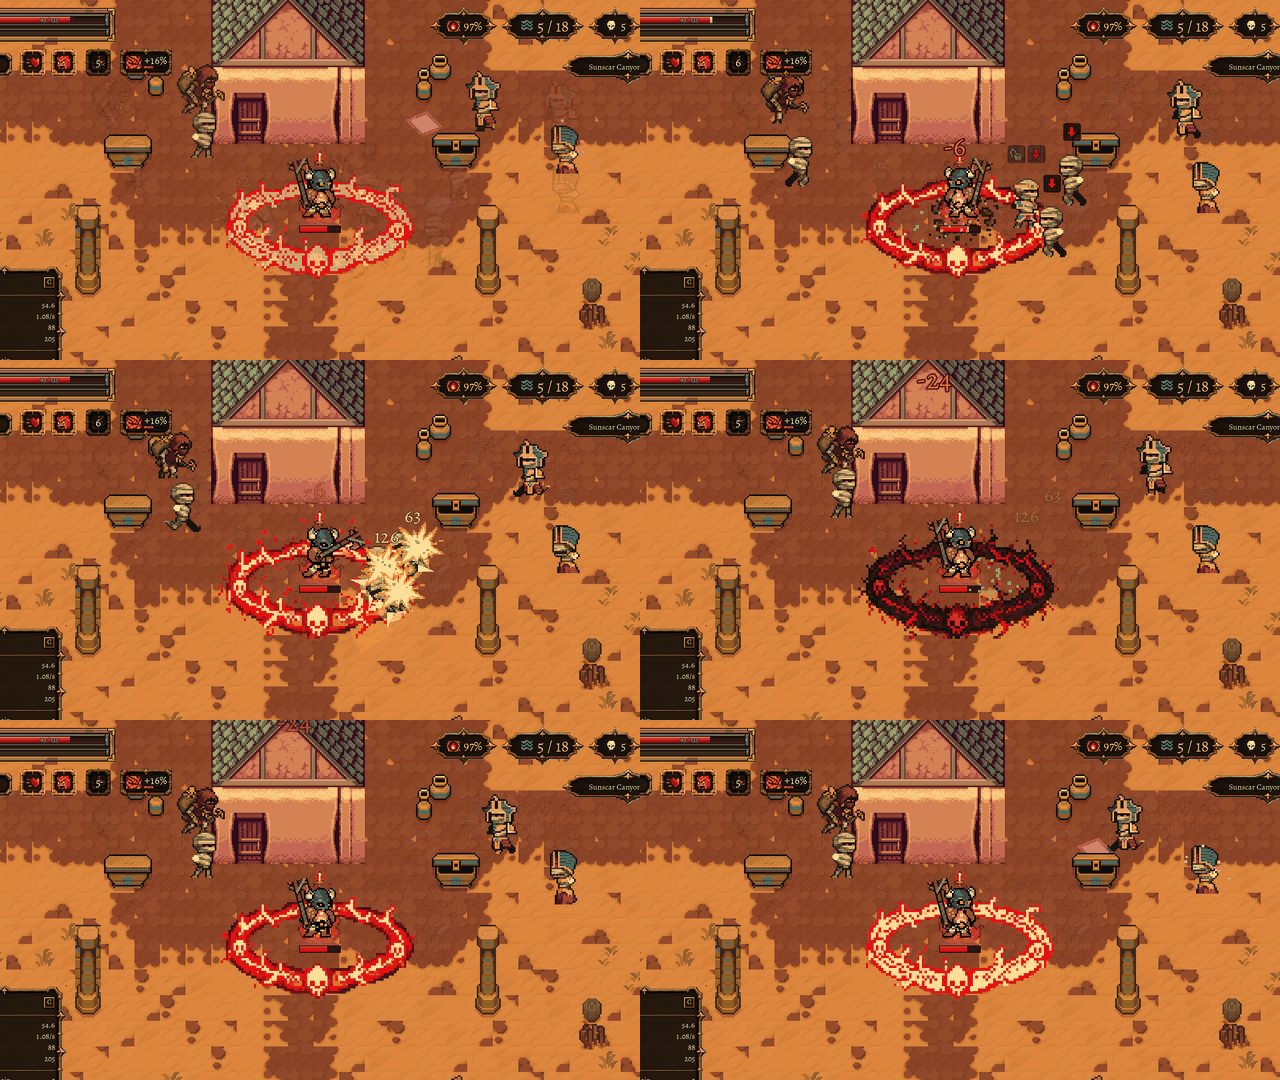
The Barbarian's fury shows. A red aura of flames wraps around him and grows the less health he has; when Rage hits its cap it bursts with a red pulse, and during Frenzy it burns almost white-hot. In the skill row, Rage shows how much extra damage it is giving you right now (for example +25%), with a small bar that fills up to the cap and glows when it gets there, and a clock when its level 3 grants attack speed. It also shows on your teammates' cards.


Warrior: Rising Fury shows. Every kill lights a pale-gold, steel-glinting aura around the Warrior that grows as long as you keep the streak going. Hitting the cap bursts a golden ring (and heals you for 5 at level 3). When the streak is about to run out, the aura flickers, so land a kill fast or it fades. Your co-op partner sees it too.

Charges you can see. Upgrades that trigger every few hits or shots keep their count under your feet and pulse when one is left: the Mage's Arcane Echo (5 gems), the Barbarian's Whirlwind (5 orbs), the Cleric's Smite and Fervor (4 crosses and 10 drops) and the Necromancer's Bone Spear (6 little bones; the staff glows green when the next shot is a spear). The Mage's Focus marks your target with up to 5 gems that turn gold at max along with your staff, and with Momentum charged the Barbarian's axe burns and the hit lands with an ember wave and a heavy impact.
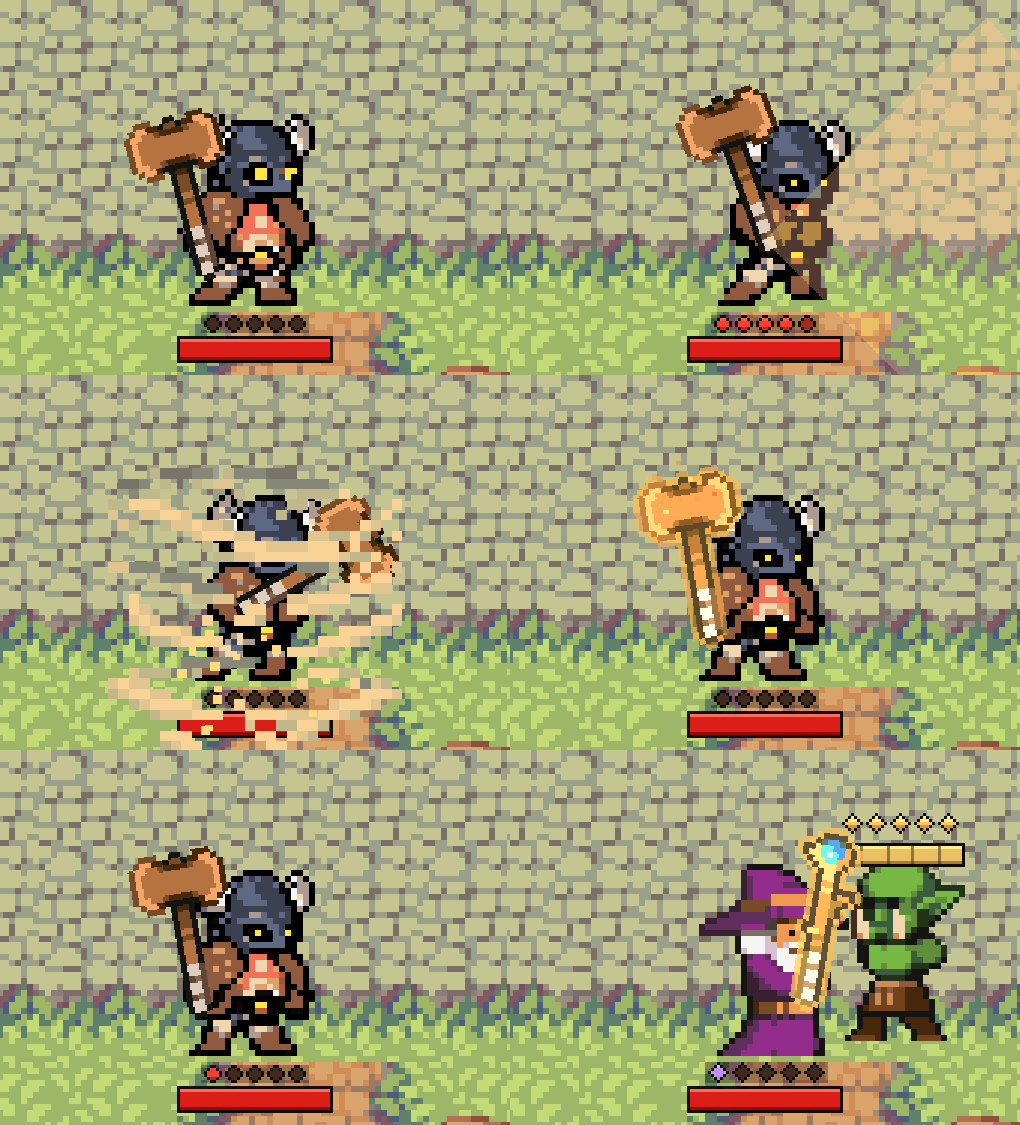
Endure, Hymn and Ward at a glance. While the Barbarian's Endure lasts, his body is outlined in steel, flickering as it is about to end. The Cleric's Hymn marks its radius with a faint golden ring at his feet, and Ward lights a golden ring around the inn's base while he guards it. All of it is visible in co-op too, local and online.

The Necromancer's skeletons, with a look of their own. A tattered hood in the colour of his robe, green fire for eyes and a notched sword, with an attack animation; they rise from the ground when summoned and fall apart into bones when they die, clearly apart from enemy skeletons. The Bone Archer has its own bow and shooting animation. They show initiative: with no target they look for a fight nearby, range well away from you and path around walls, trees and houses. With Ambush, skeleton warriors leap onto nearby enemies, hit harder and stun them; Bone Armor is a cloud of bones that thickens with every living skeleton, and Army of the Dead waits ready until something dies: from then on, for 5 s, every enemy that falls rises instantly (up to 6), then it recharges for 15 s. They also grow with your weapon: their health and damage rise with the Necromancer's weapon level, refinement and damage cards, so they stay relevant on the higher maps and difficulties.
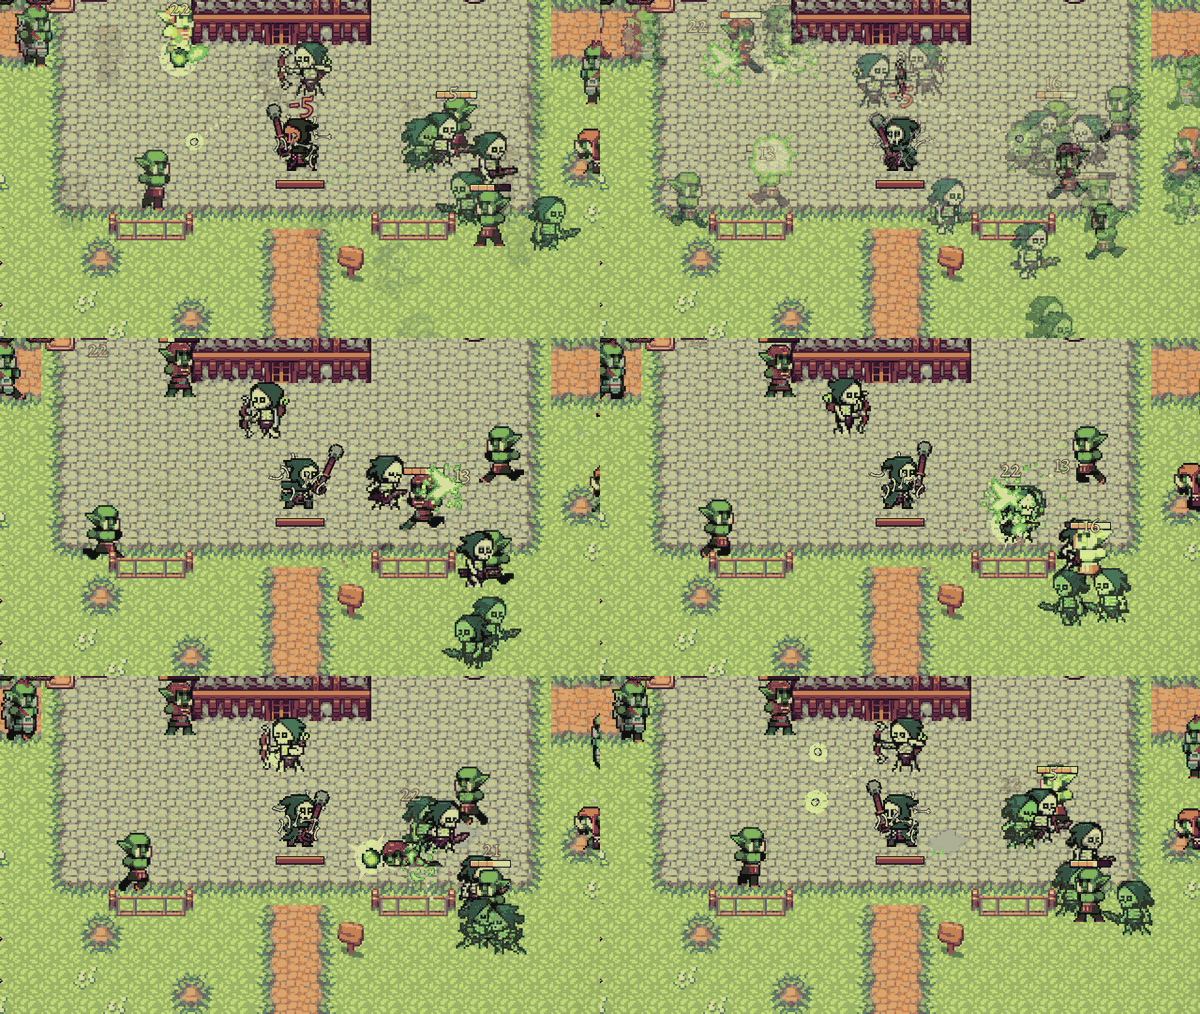
A dodge for every class
Shift on keyboard or the left trigger on a controller: a short burst toward where you're moving, or where you're facing if you stand still, invulnerable for the whole dash. It's enough to get out of a boss's leap circle or cross a shockwave's strip. Same distance and the same 3 s cooldown for every class; what changes is how it looks: the Ranger rolls, the Mage teleports, the Warrior charges, the Barbarian leaps, the Necromancer falls apart into bones and reassembles further on, and the Cleric leaves a trail of holy light. It stops against walls, its cooldown shows as a ring under your feet and it can be rebound in Options › Controls. In co-op each player dodges with their own controller, and your partner's dodge looks the same on your screen.
Three new maps and The Breach
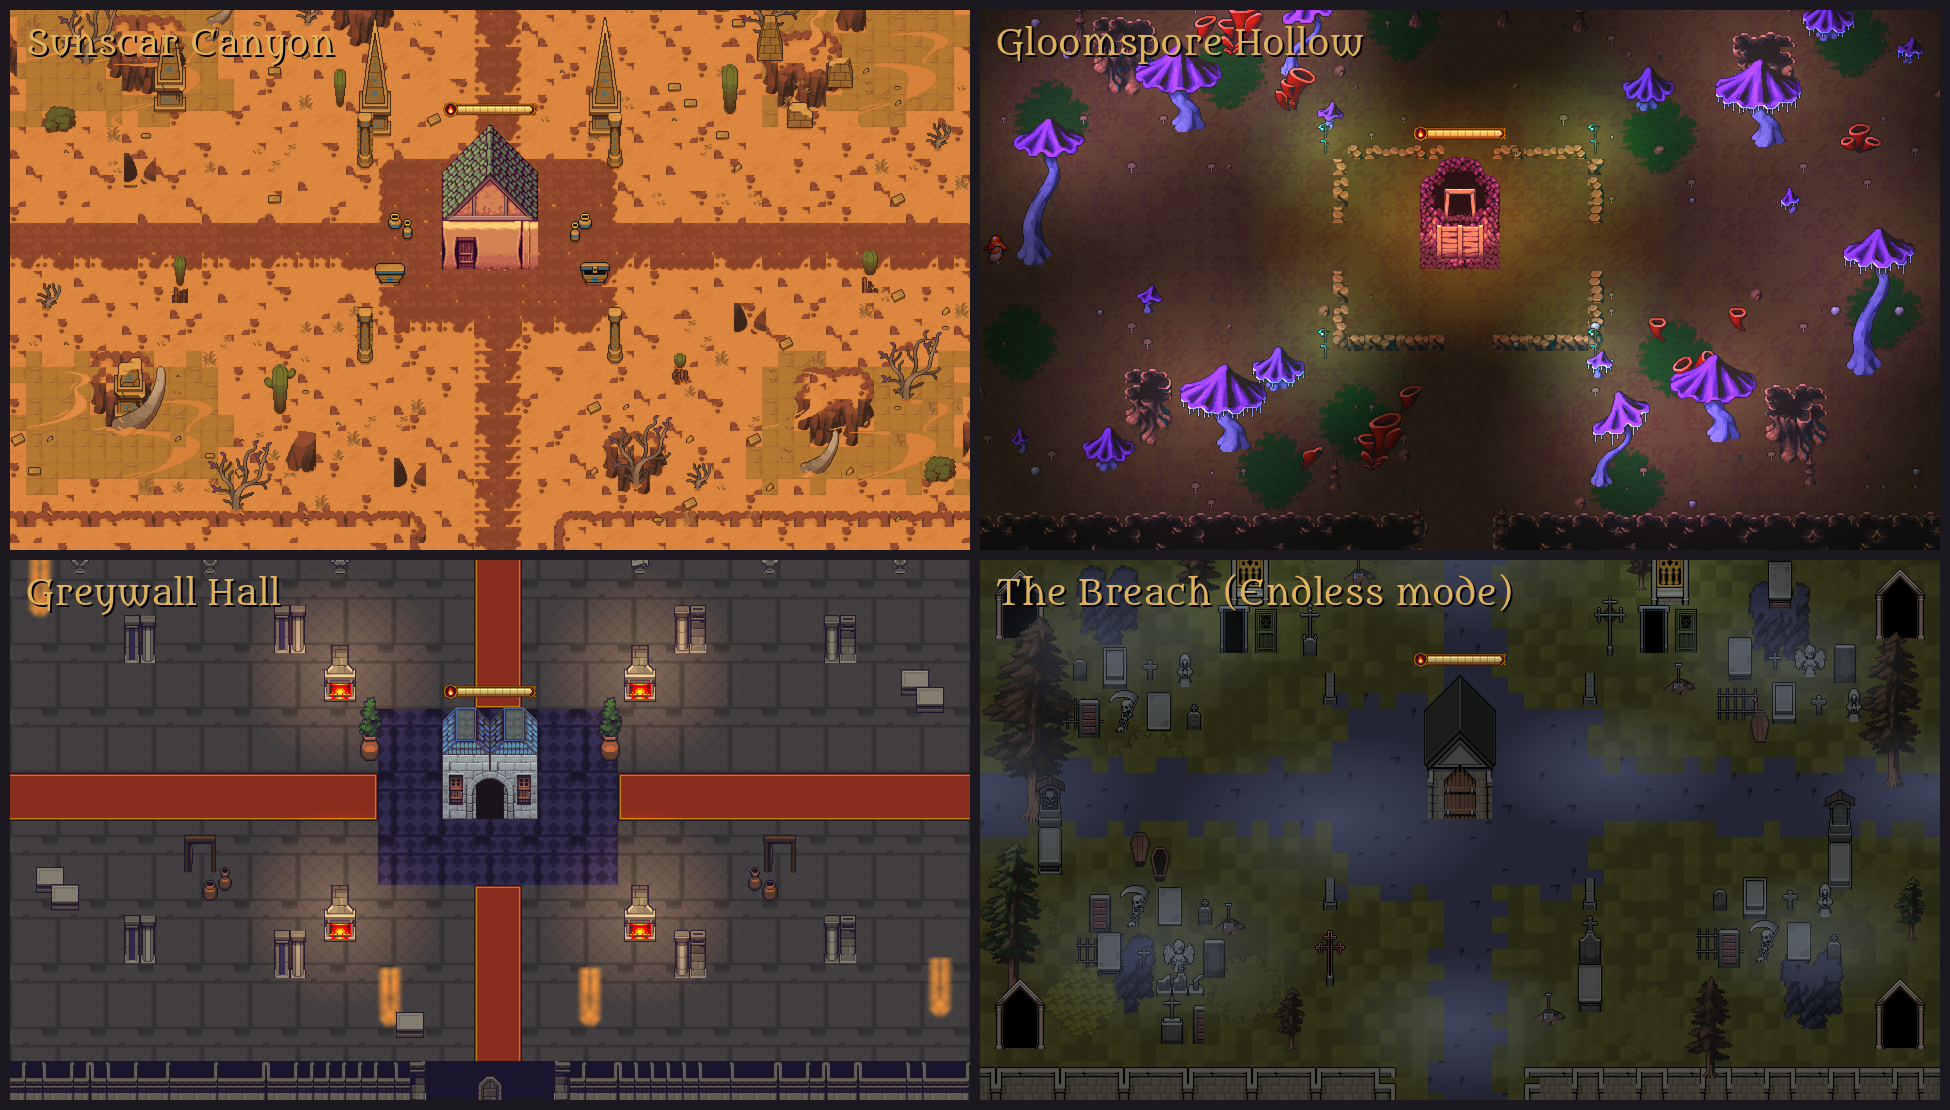
- Sunscar Canyon (18 waves): the desert necropolis. An open canyon, loose sand that slows you down, sandstorms, and the mummies of the first Wardens.
- Gloomspore Hollow (21 waves): the cave of the bloom. Narrow chokepoints, darkness lit by glowing mushrooms, spore puddles that punish, and skeletons returning in acts II and III.
- Greywall Hall (24 waves): the castle of the broken guard. The longest map, with sustained pressure, sword-wielding soldiers, crossbowmen in the galleries, scouts who throw javelins, priests who charge up golden light and heal their own (hit or stun them while they charge and the heal is lost) and four gates that can open at once.

Every map brings its own enemy family, its three bosses (telegraphed charges and shields you break by killing the escort), its events and its terrain. They unlock in a chain: win the previous one. Snowbound Outpost no longer reuses the forest's waves: it has its own, with skeletons from act II. The inn changes its look with each biome.

Bosses with their own art. Bosses are no longer a scaled-up regular enemy: each one has its own design (Kruk with his stone fists, Zhul with his skull headdress, Gorrak with the siege banner, Sahrek, Ser Maldric, The Wailer…) and an attack animation that lands right on the hit, in co-op too. Kruk, Zhul and Gorrak return in Snowbound Outpost, risen from death and covered in frost. The Desecrator, the Guard Captain, the Scout and the Newly Awakened have their own art as well.


Bosses no longer fall behind if you back off. The melee ones have a way to reach you: Kruk, Brak, Sahrek, Ser Odran and Vorn leap onto you; Gorrak, Ser Maldric and Vorn charge; and Gorrak, Ruhk, Vissk, Grulm and Ser Maldric send something along the ground in a line (a siege stone, a sand wave, spores, roots or a slash). They always warn first with a red circle or strip on the floor: get out of it.


The Breach, the endless mode: a sixth map with no end, beneath the inn. Ten-wave cycles with a different dominant family each cycle (orcs, skeletons, mummies, fungi, the broken guard…) and always The Awakened, the graveyard family. A miniboss on the fifth wave, a boss on the tenth, and from the sixth cycle two families and two bosses at once. Everything scales without a ceiling and upgrades lose their stack cap, with diminishing returns. It has a single difficulty: what grows with the waves is the number of enemies (up to four times as many, 48 alive at once). It starts above Greywall Hall on Normal: it is the step after the last map. Local record, wave challenges at 25 / 50 / 100 (100 unlocks the cursed weapon skin) and the longest challenge in the game to open it: win all five maps on all four difficulties.

World ranking for The Breach. When a run in The Breach ends, your wave goes up to the Steam leaderboard (one for solo and one for co-op) and the summary tells you where you placed. On the map card, the Ranking button shows the global board, your neighbourhood and your friends.
Seeded runs. In map selection you can type a seed to replay the waves and events of a run, or share it with a friend. Seeded runs don't count for the ranking or achievements.
Every map is a step up
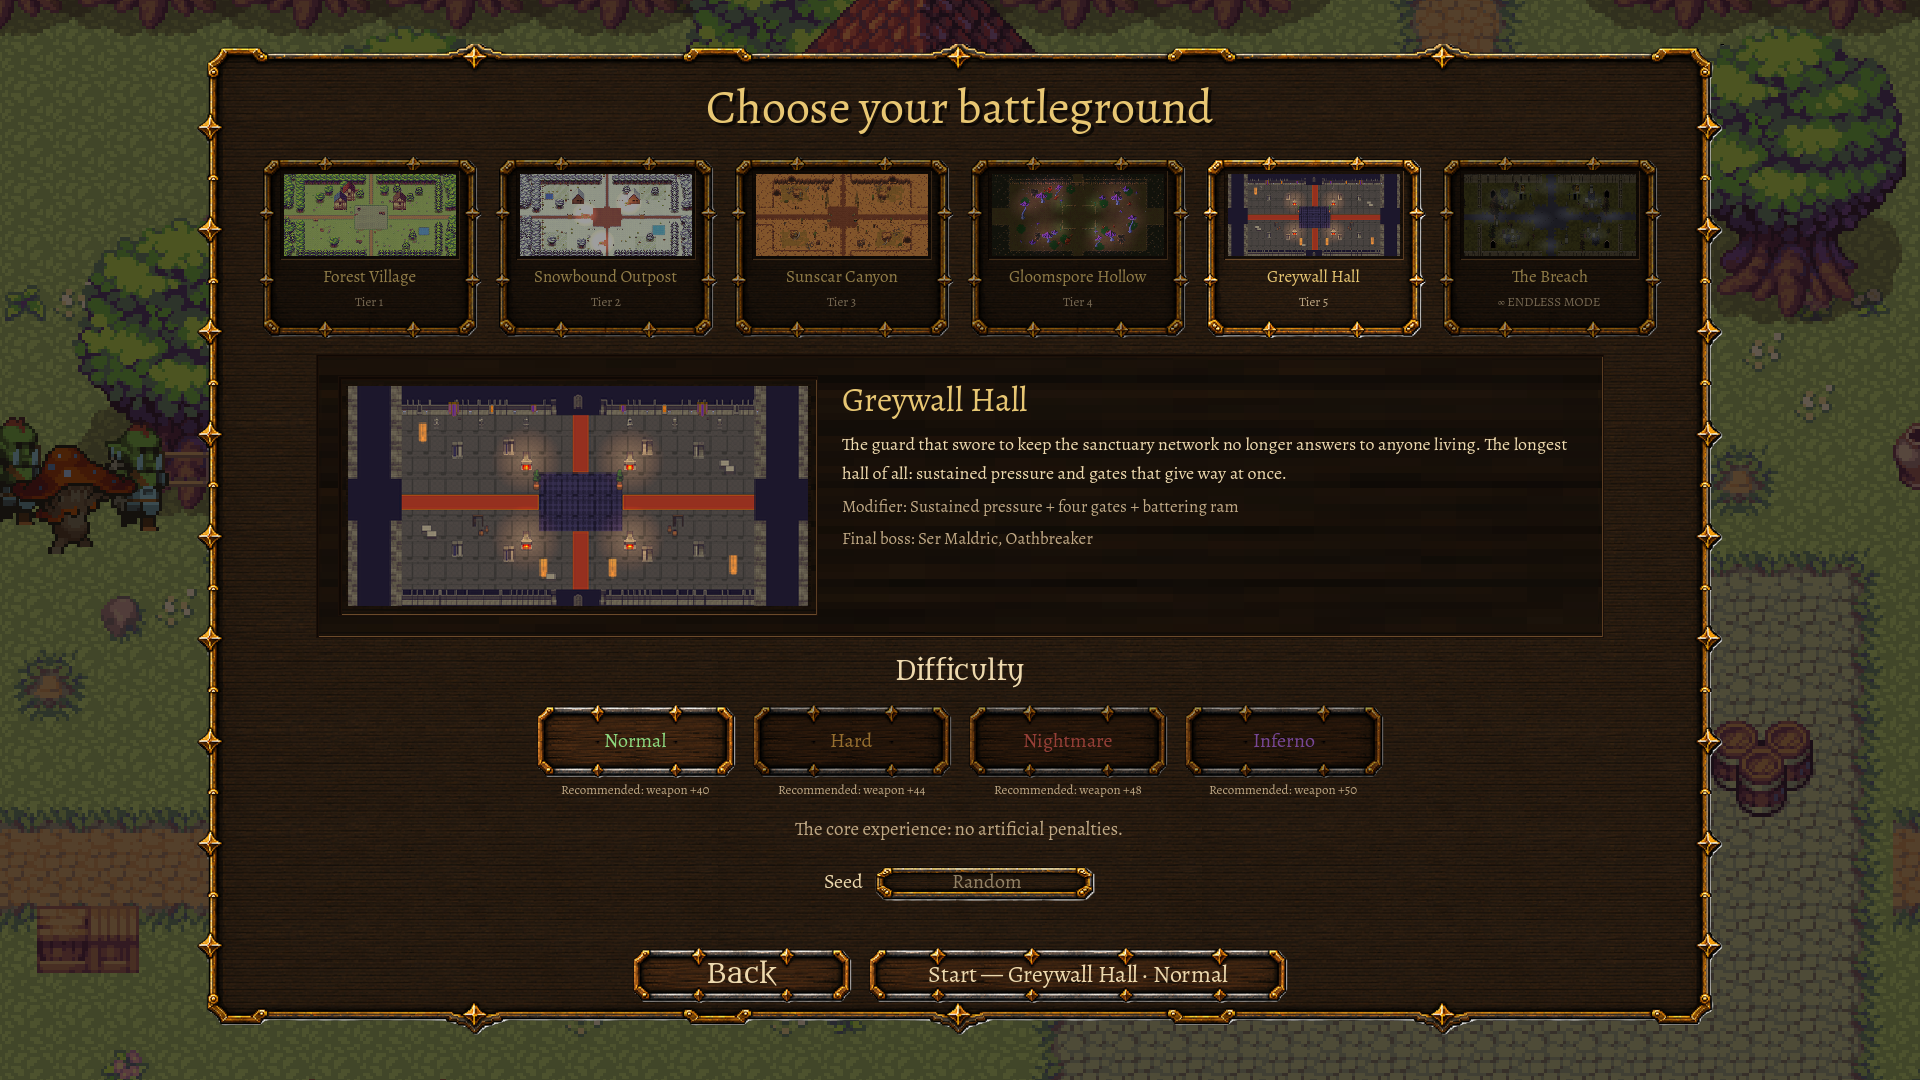
Every map multiplies the health and damage of everything that spawns (regulars, bosses and summons), brings more event waves per act and more elites, and is designed around the weapon tier you earn on the previous one: Snowbound with Rustic iron, Sunscar with Desert gold… Greywall with Heraldic steel. Every difficulty asks for one tier more, and The Breach is where the Fiery forge belongs.
The first waves of each map ramp up (the full step applies from act II), the inn has more health on the higher maps (up to 1045 in Greywall) and you start with more supplies. Bosses feel the difficulty: on Hard, Nightmare and Inferno they have more health and hit harder. Nightmare and Inferno hit and run a little less hard than before, because what goes up now is enemy health and elites, not dying in three hits.
Ten new achievements: win on Nightmare and win on Inferno on each of the five maps.
Events that change with the map and the difficulty
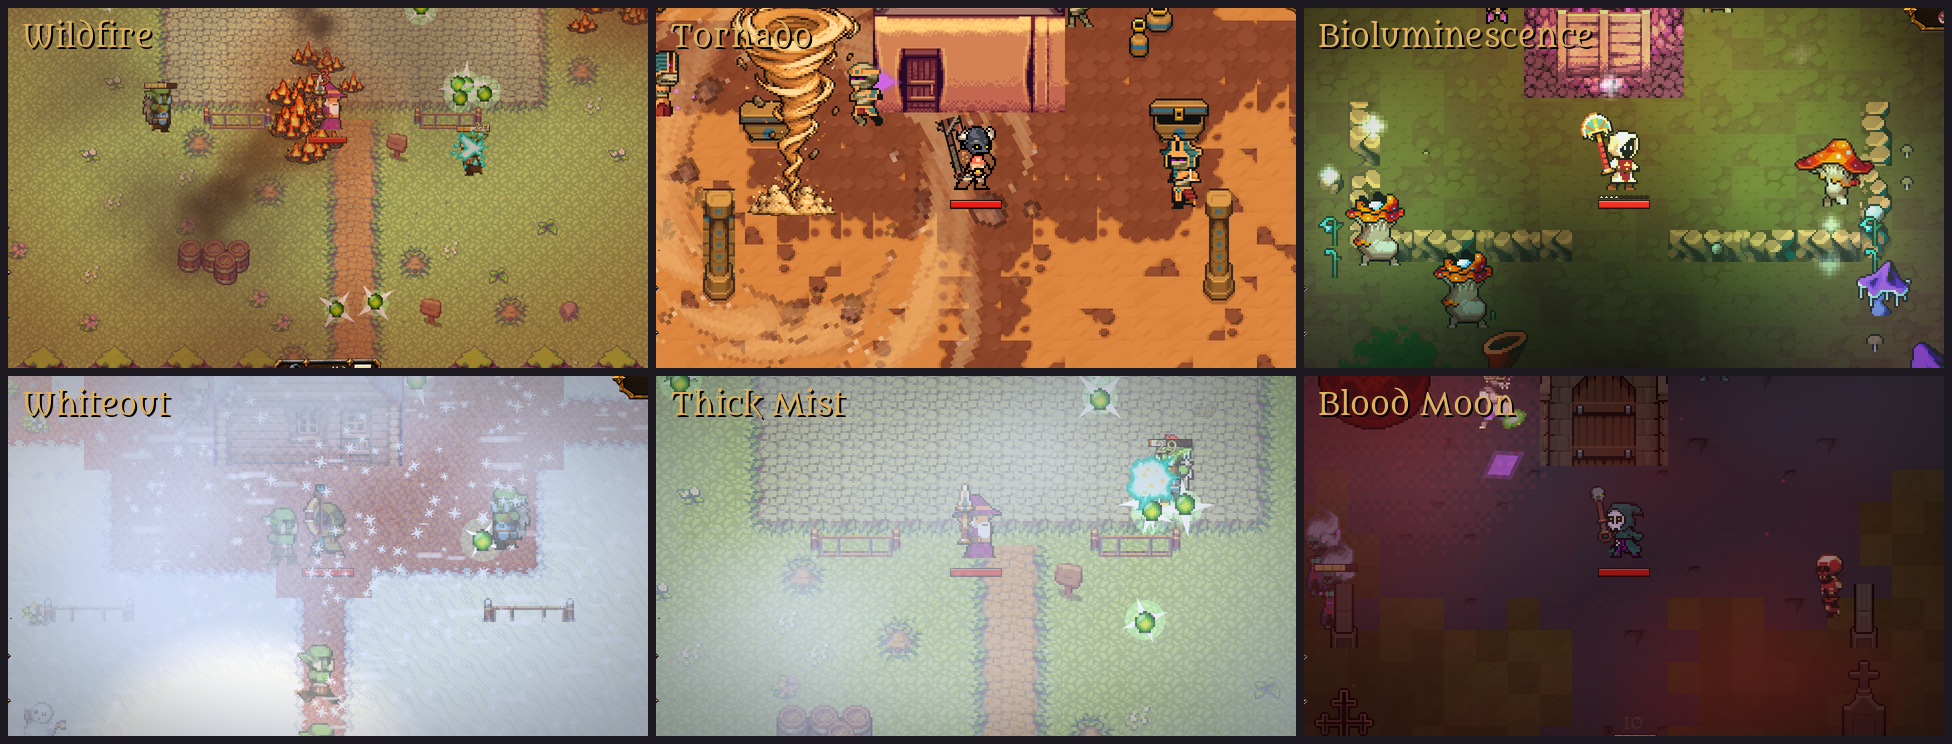
Every map has its own events and every difficulty opens three more: nine new ones per map and six of The Breach's own. On Normal you keep seeing the usual ones; on Hard come rain, gales, fireflies, snowfall, aurora, dust devils, an oasis, mirages, portcullises…; on Nightmare thunderstorms, roots, whiteout, black ice, avalanches, a scorching sun, a swarm, cave-ins, total darkness, blackouts…; on Inferno wildfire, eclipse, stampede, polar night, hail, earthquake, tornado, flood, firedamp, catapults, ghosts of the guard and the Breach opening under your feet.
There are two kinds: whole-wave events and bursts, which break in mid-wave for 10–40 seconds with a short warning and no pause. Some are in your favour (aurora, oasis, boiling oil…).
Events are seen and felt, and nearly all of them at the quality of the Thick Mist: layered fog and snow, darkness with lit edges and floating motes, rain with sky and splashes, dust after cave-ins, auroras, eclipses, animated roots and hands. Wind pushes everyone (bosses less), tornadoes and dust devils drag you along, lightning and rocks give a warning before they fall and leave their mark on the ground. If a bolt hits you, you are electrocuted for two seconds, with its own animation for all six classes (enemies too). Their damage grows with the map and the difficulty, like the enemies', and a single hit never takes more than 60% of your health: on the higher maps you have to dodge them. Weather particles have real shapes (snowflakes, rain streaks, sand grains, hail, embers, spores…). In co-op your teammate sees exactly what you see.


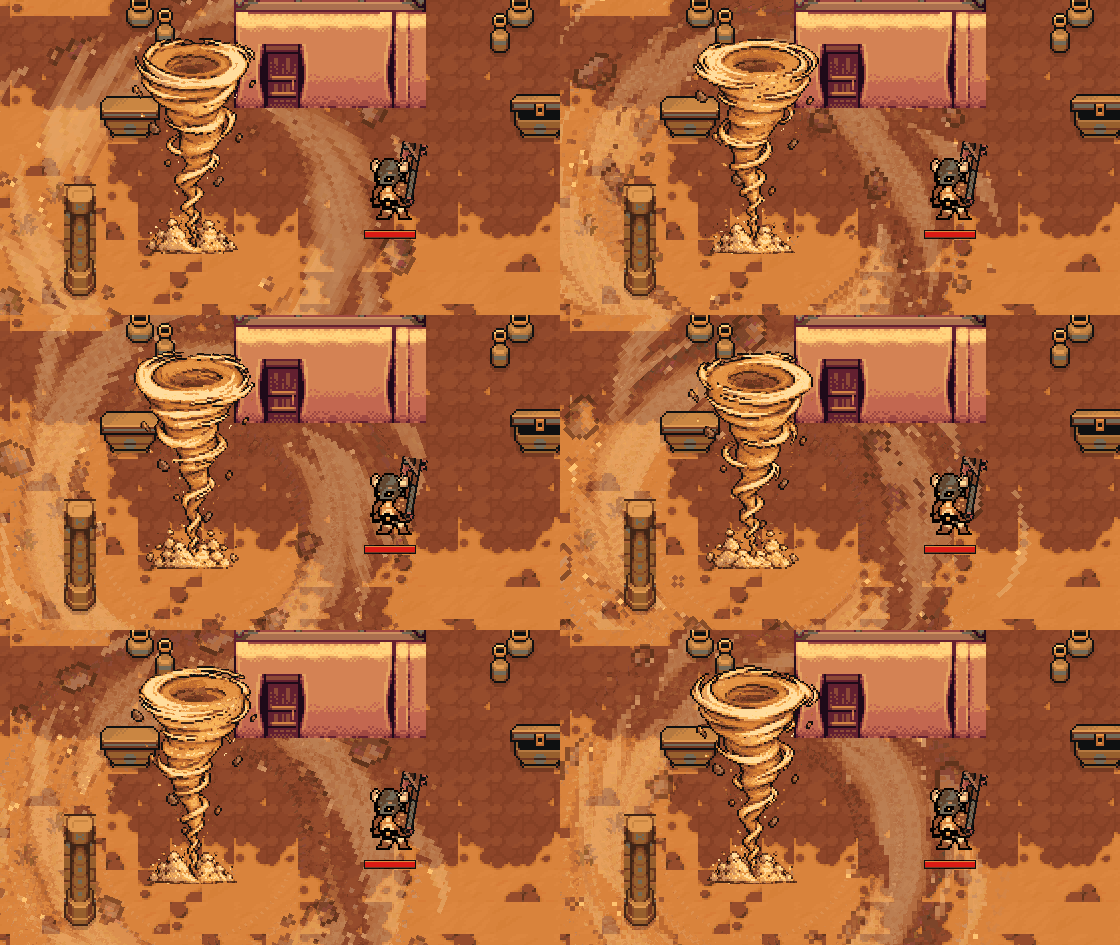
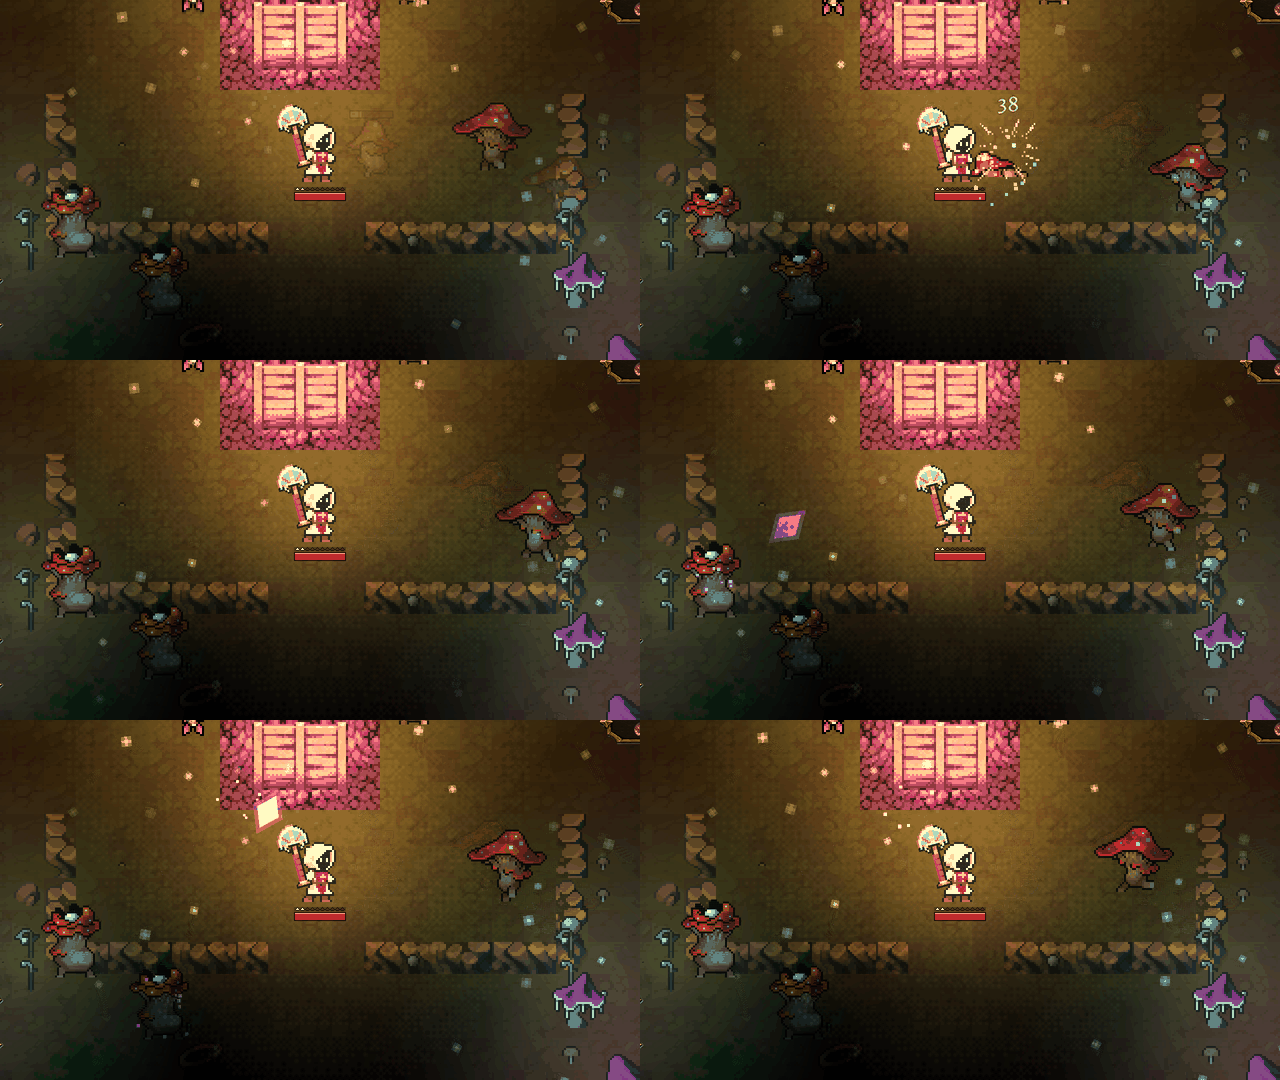
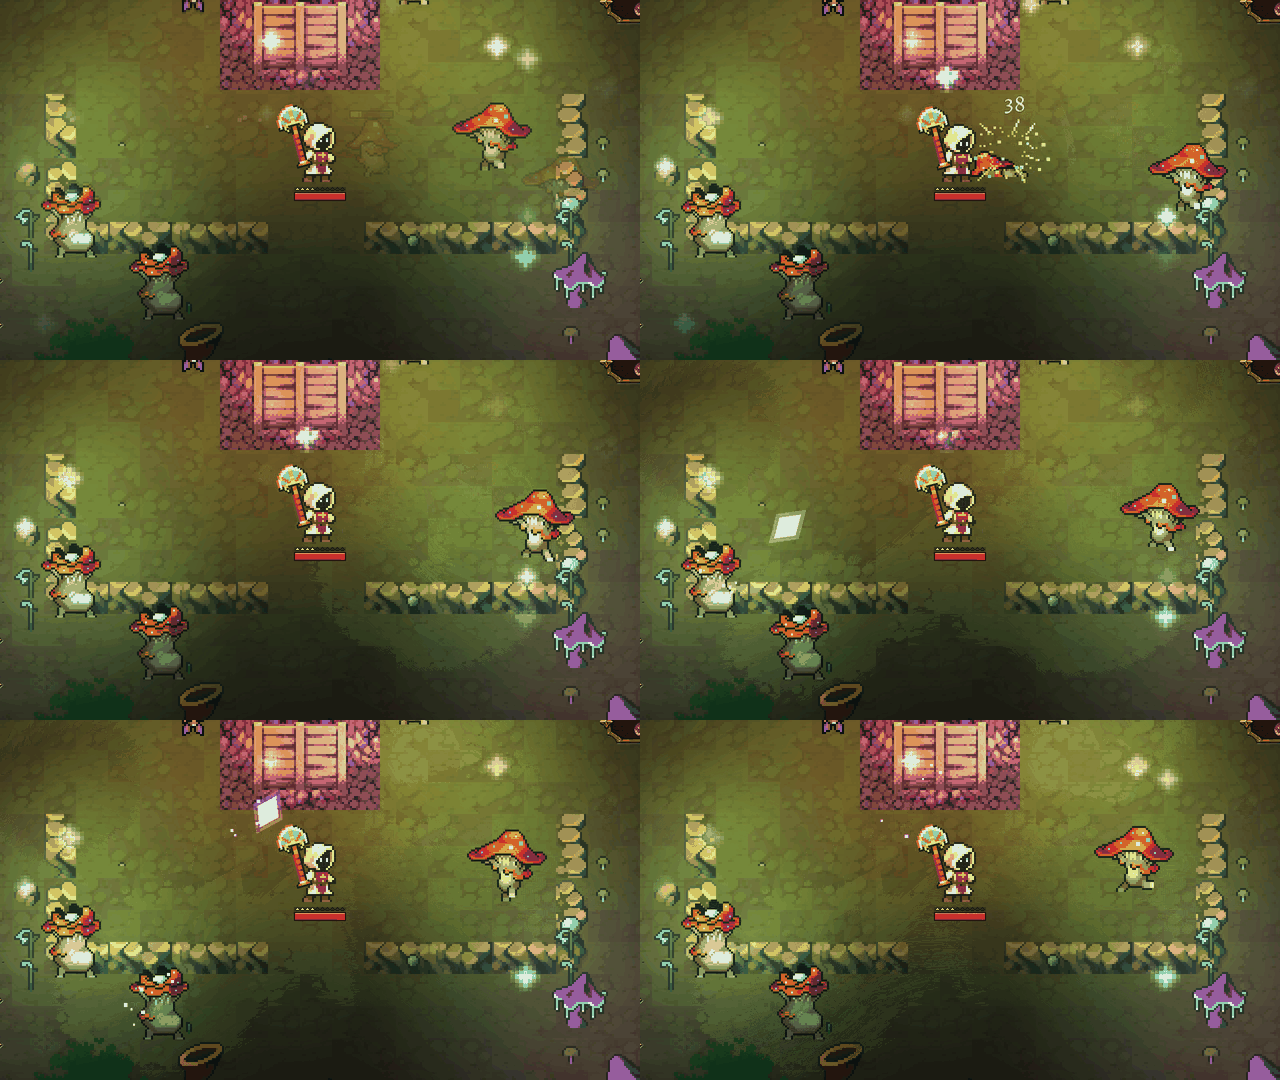

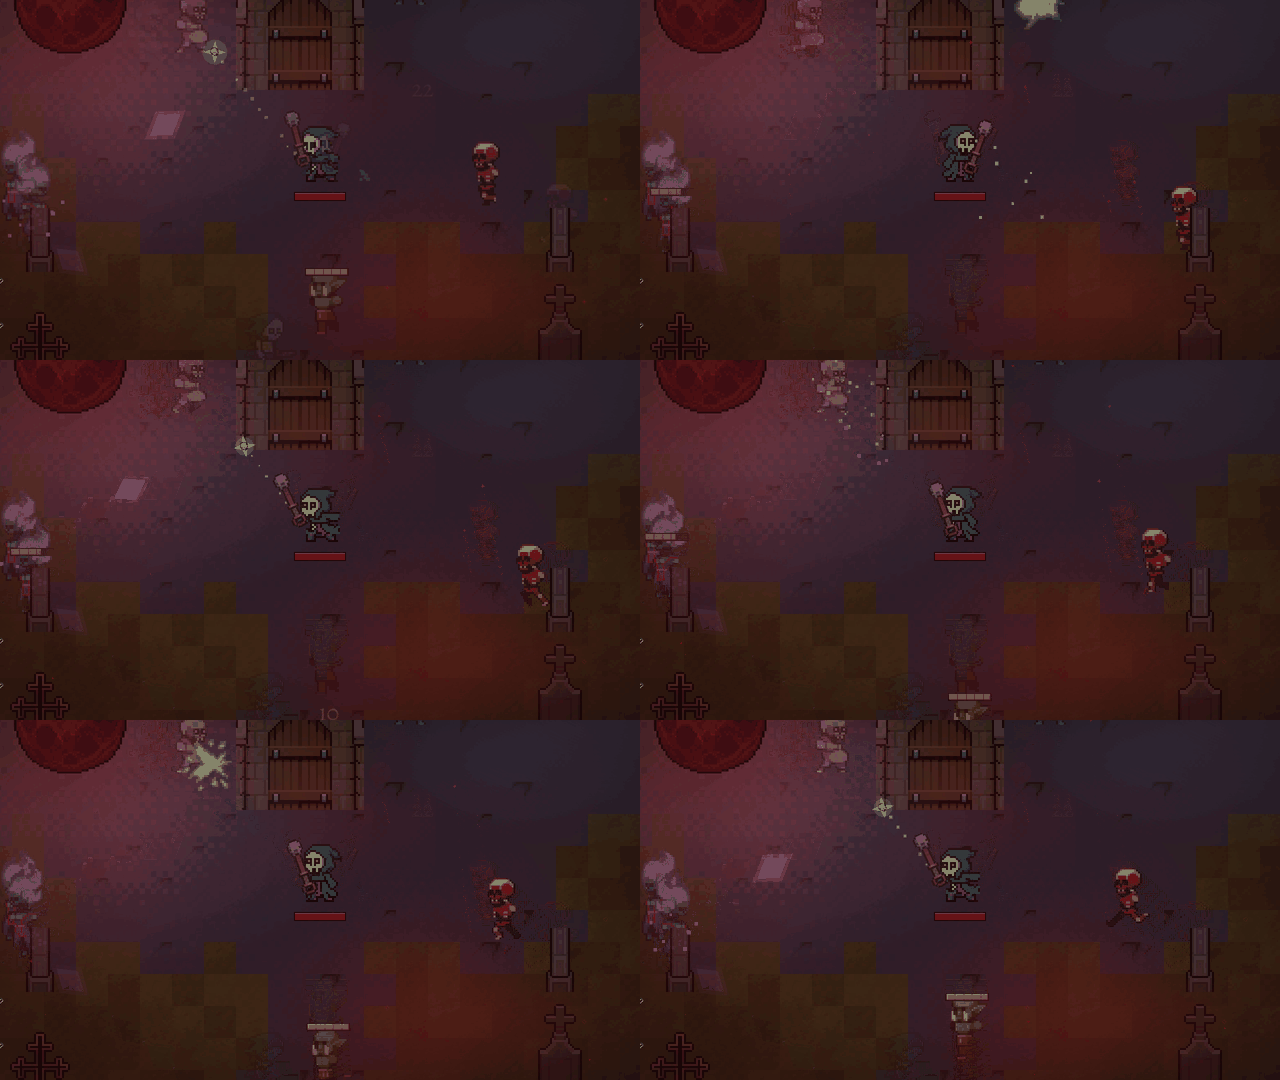
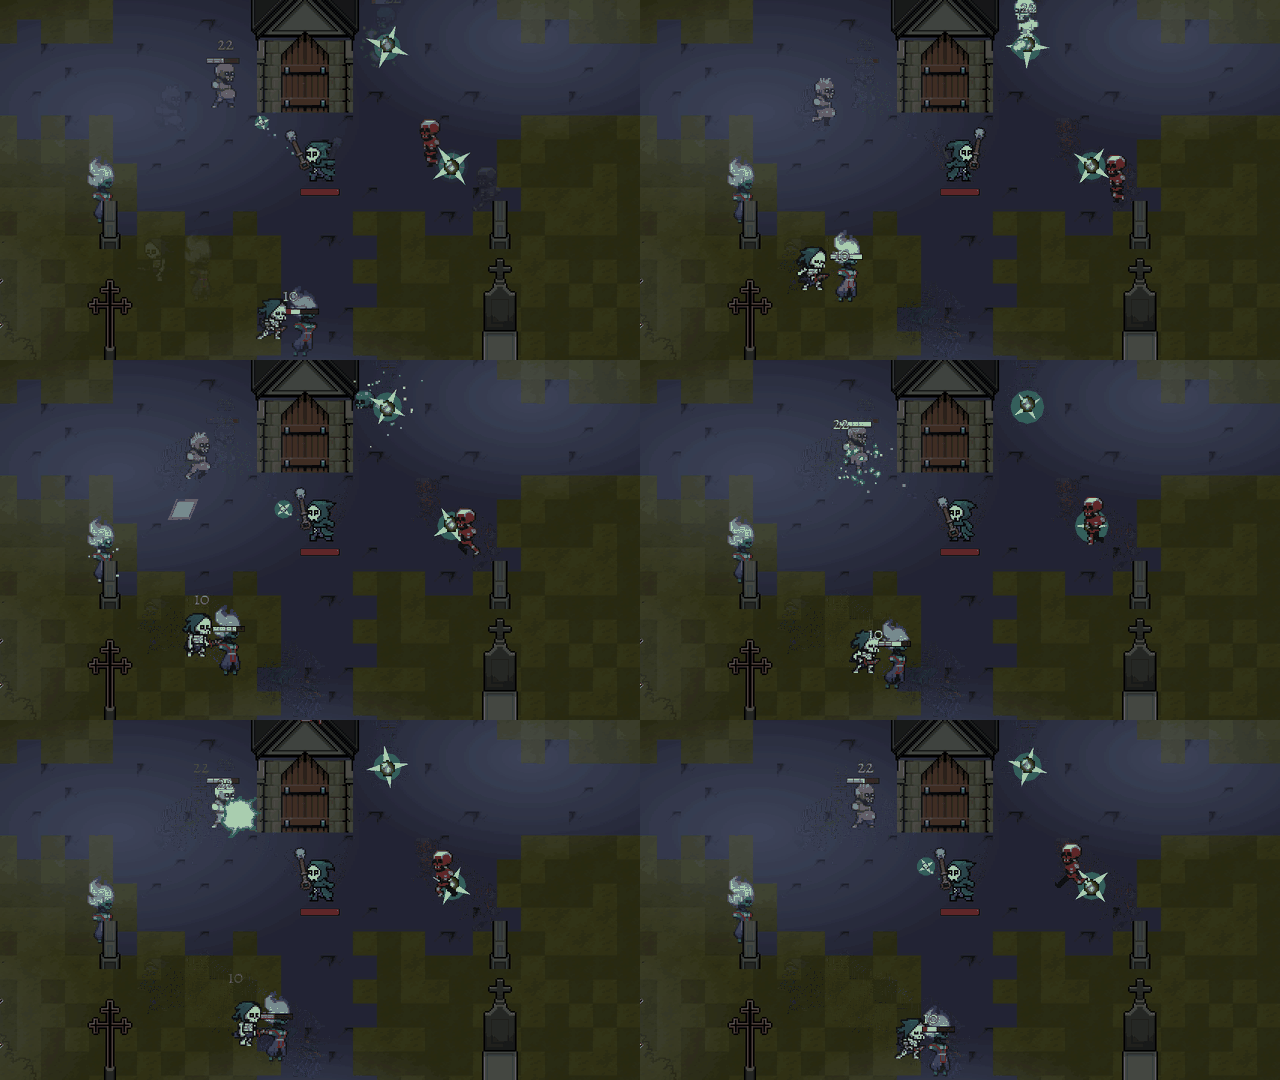
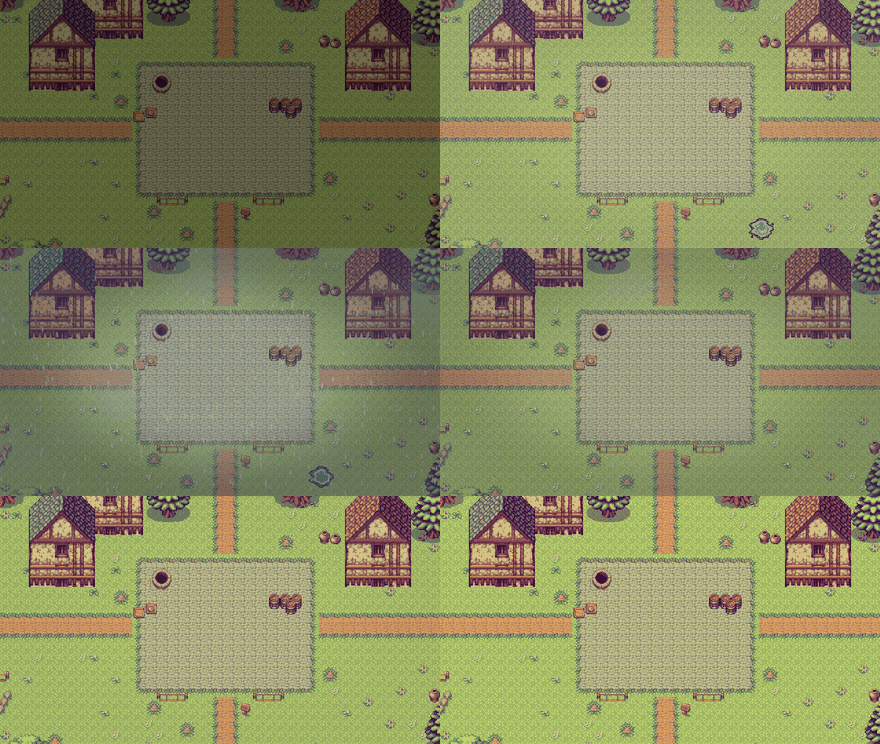
Events fade in and out. Rain stops falling and its haze clears over a couple of seconds, darkness and fog return to the act's light without jumps, and the inn's torches light up at nightfall and go out at dawn with a fade. In the Gloomspore cave, where dawn never comes, they stay lit the whole run.

89 upgrades, six traps, weapon tiers
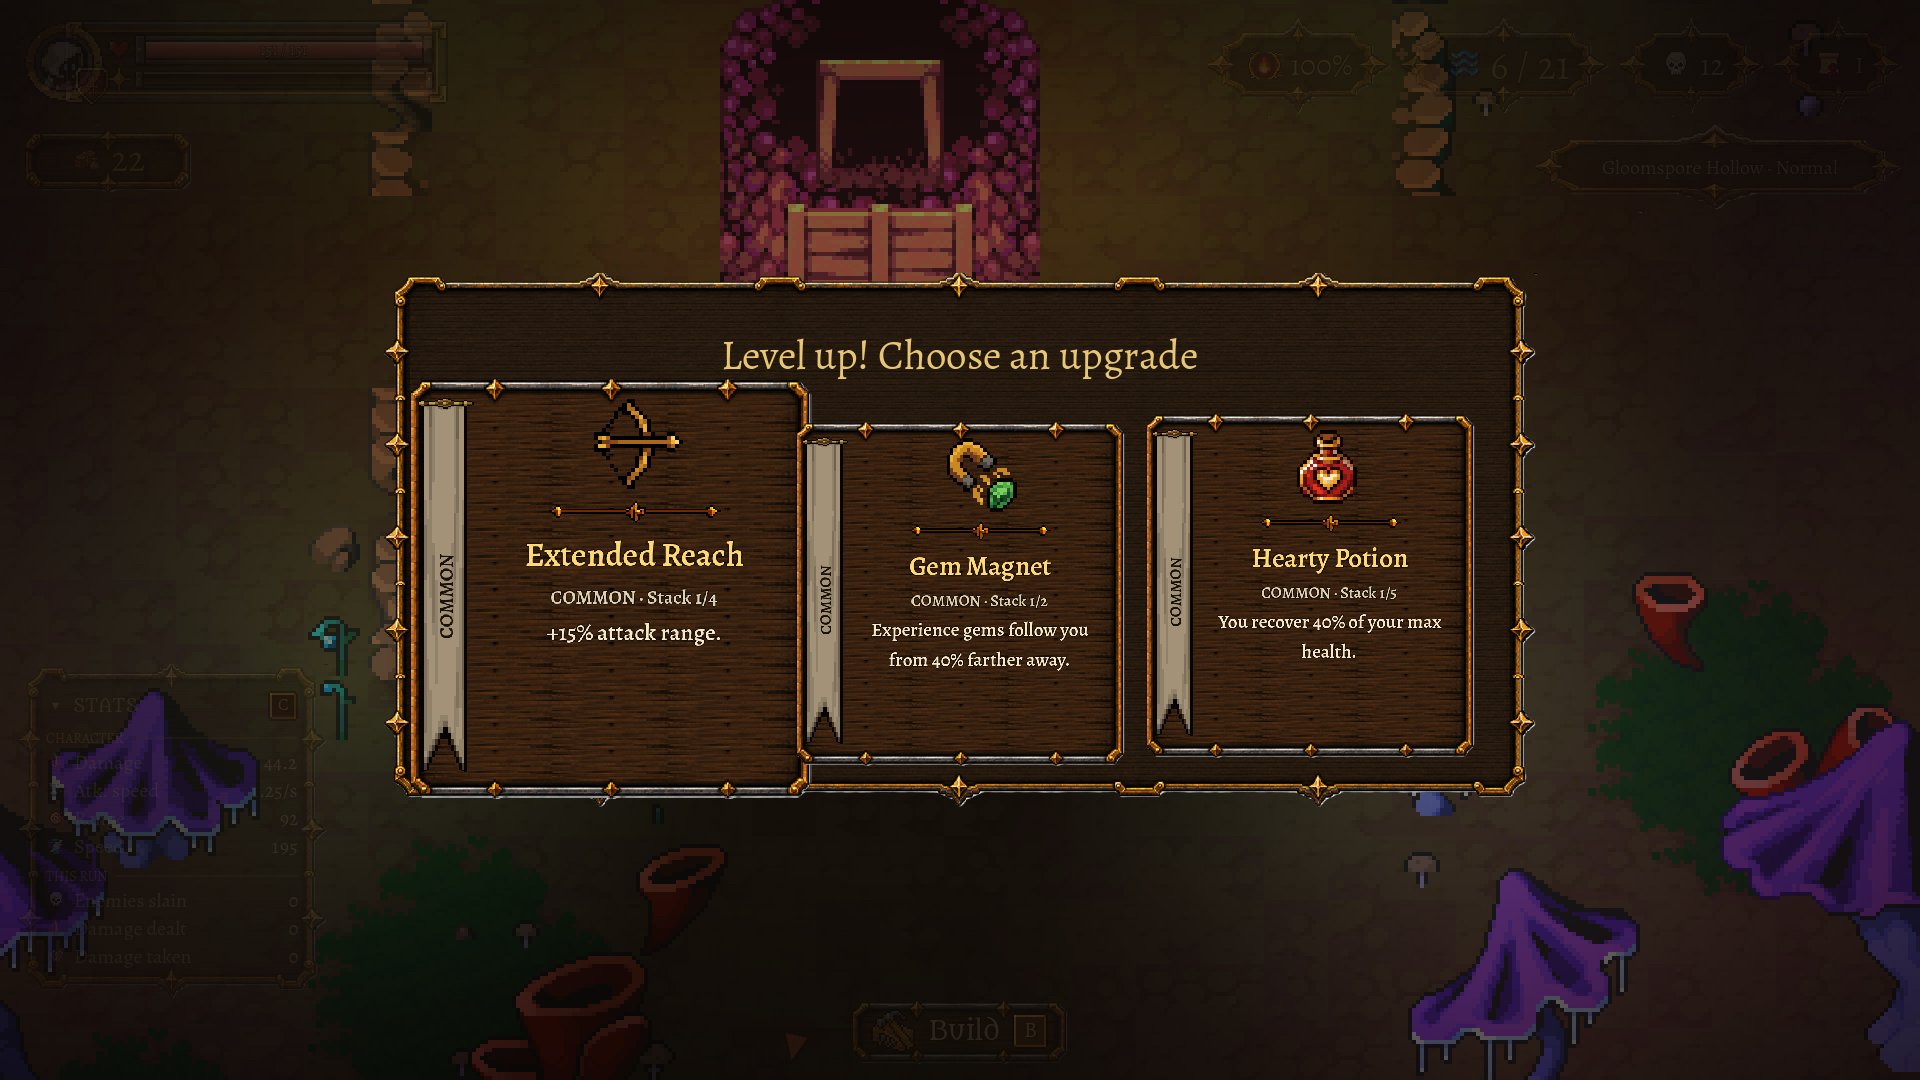
Upgrades between waves: 89 cards. Every class now has twelve upgrades of its own, some of which only show up once you have taken another (the Mage's Orb and the Ranger's Trap evolve, and so do several of the new classes' cards). There are three new general upgrades and mechanics that did not exist before: shields, critical hits, and the run knows who killed each enemy (some upgrades reward your own kills). Commons are there from the start; rares and epics are bought with Renown on the Progression screen. Cards show a large icon, a rarity or class ribbon, the full effect and the number they actually apply at each level.
Upgrades have their own pixel-art effects: Fervor's healing pulse, the holy rings of Consecrate and Sanctuary, the light columns of Smite and Judgment, Intimidate's ring of fear, the Dread ring under each skeleton, the Warrior's Shockwave, Executioner's flash and more.
The Compendium is a compact window over the game, the same size in its three tabs (Upgrades, Story and Bestiary); longer entries scroll inside their card. It opens from the main menu's Compendium button (formerly "Upgrades"), and its Story tab has Watch prologue to replay the prologue whenever you like.

Six new traps. Iron Bear Trap, Tar Pit, Ember Plate, Spring Beam, Powder Keg and Hunter's Rune, each with a role: pin down the fast ones, slow an area, burn a crowd, push back, blow up the heavy ones or mark targets for the towers. They combine: fire ignites the tar, the spring throws the enemy back onto the spikes. Every trap upgrades in-run through three levels (I → II → III); they unlock in a chain with Renown and are expensive on purpose. New passive Fine Mechanisms (+2 uses on every trap) and the Trapper challenge (150 trap kills).


New, animated defense art. The Ember Plate is an iron grate over live embers, and the Archer and Magic Towers are brand new: tall, slender watchtowers, with the archer shooting from the platform and the crystal floating above the spire. Walk behind one and it turns see-through, so you never lose sight of your character. Every attacking defense moves, idle or on hit, and every upgrade shows: traps change their look at II and III, and towers at II (a tiled conical roof on the Archer Tower, gold trim on the Magic Tower). The build-mode cards show the same new art.

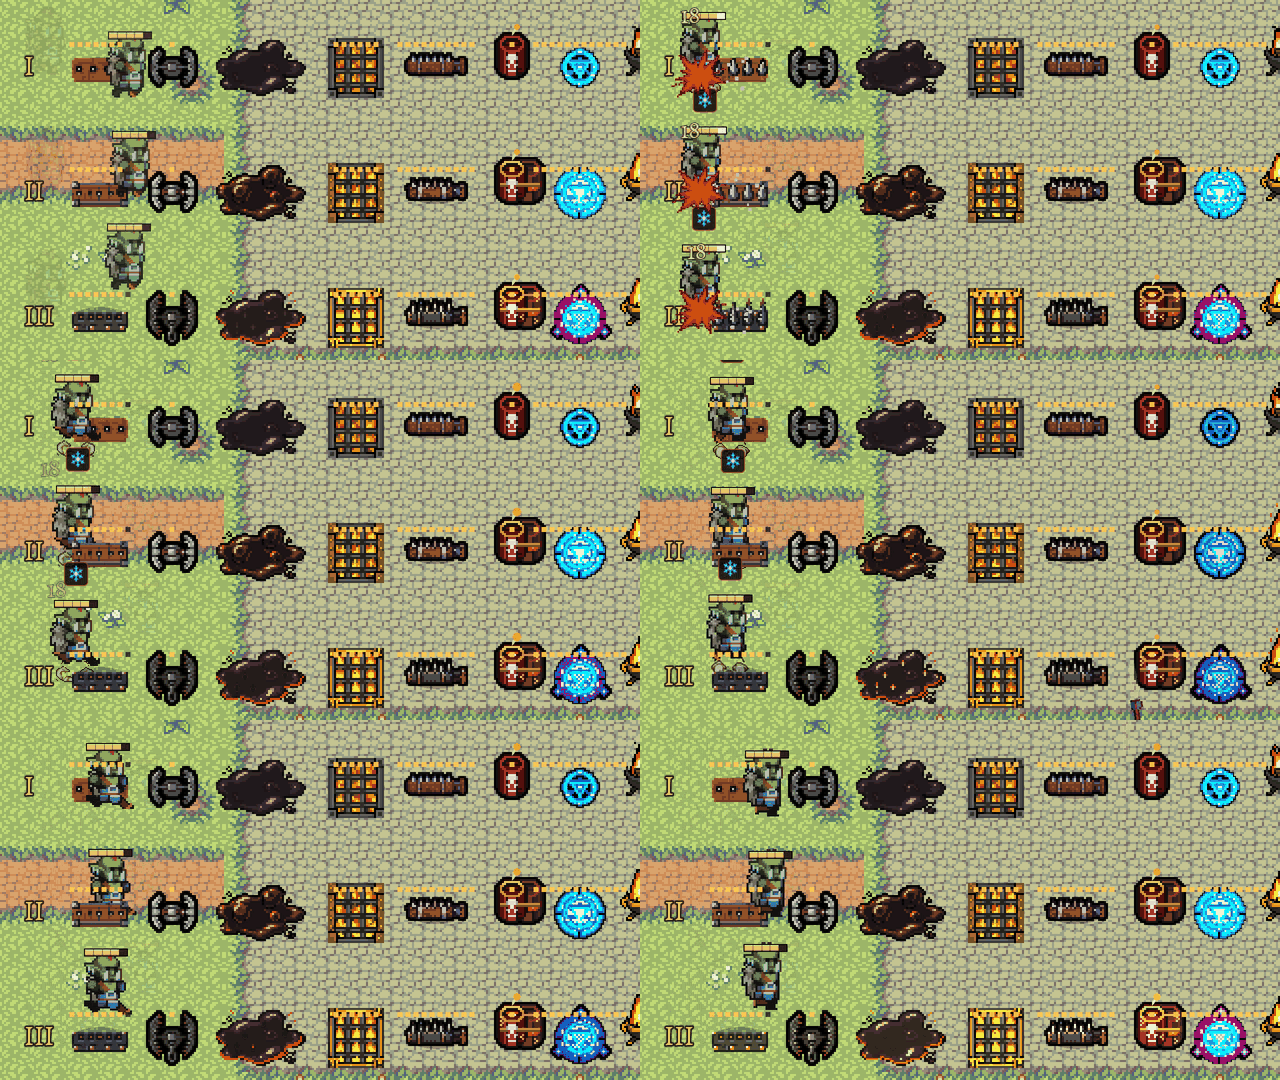
Renewed defense menu. Selecting a defense brings up a strip with the key, icon and price of each action (repair, sell, move, upgrade); the health bar sits at the foot of the defense, where the menu does not cover it. Moving a defense works straight from the selection, without entering build mode, and shows where it will go.

Build bar. The selected trap or defense grows in the build bar, carousel-style, on top of being highlighted, so it's clear at a glance what you're about to place.

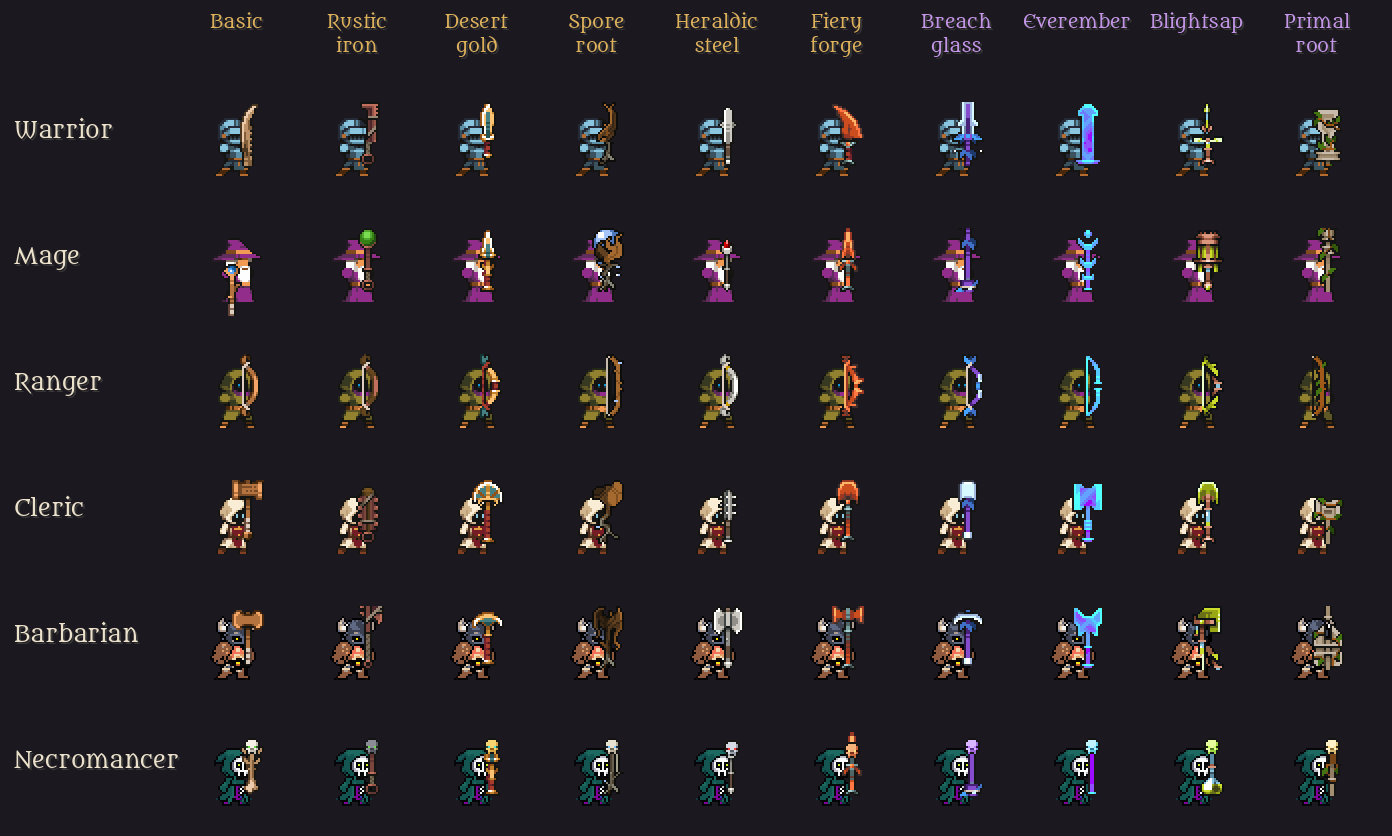
Weapon tiers. Every weapon has ten named tiers. The first six, from Basic to Fiery forge, open up as you win each map in order (×1.3 / ×1.6 / ×2.0 / ×2.5 / ×3.0 damage); the last four, Breach glass, Everember, Blightsap and Primal root, open up by winning Greywall Hall on Normal, Hard, Nightmare and Inferno (×3.6 / ×4.3 / ×5.1 / ×6.05). Every tier also adds +8% max health and is bought with Renown; in co-op everyone hits with their own weapon tier.
Progression, compendium and interface

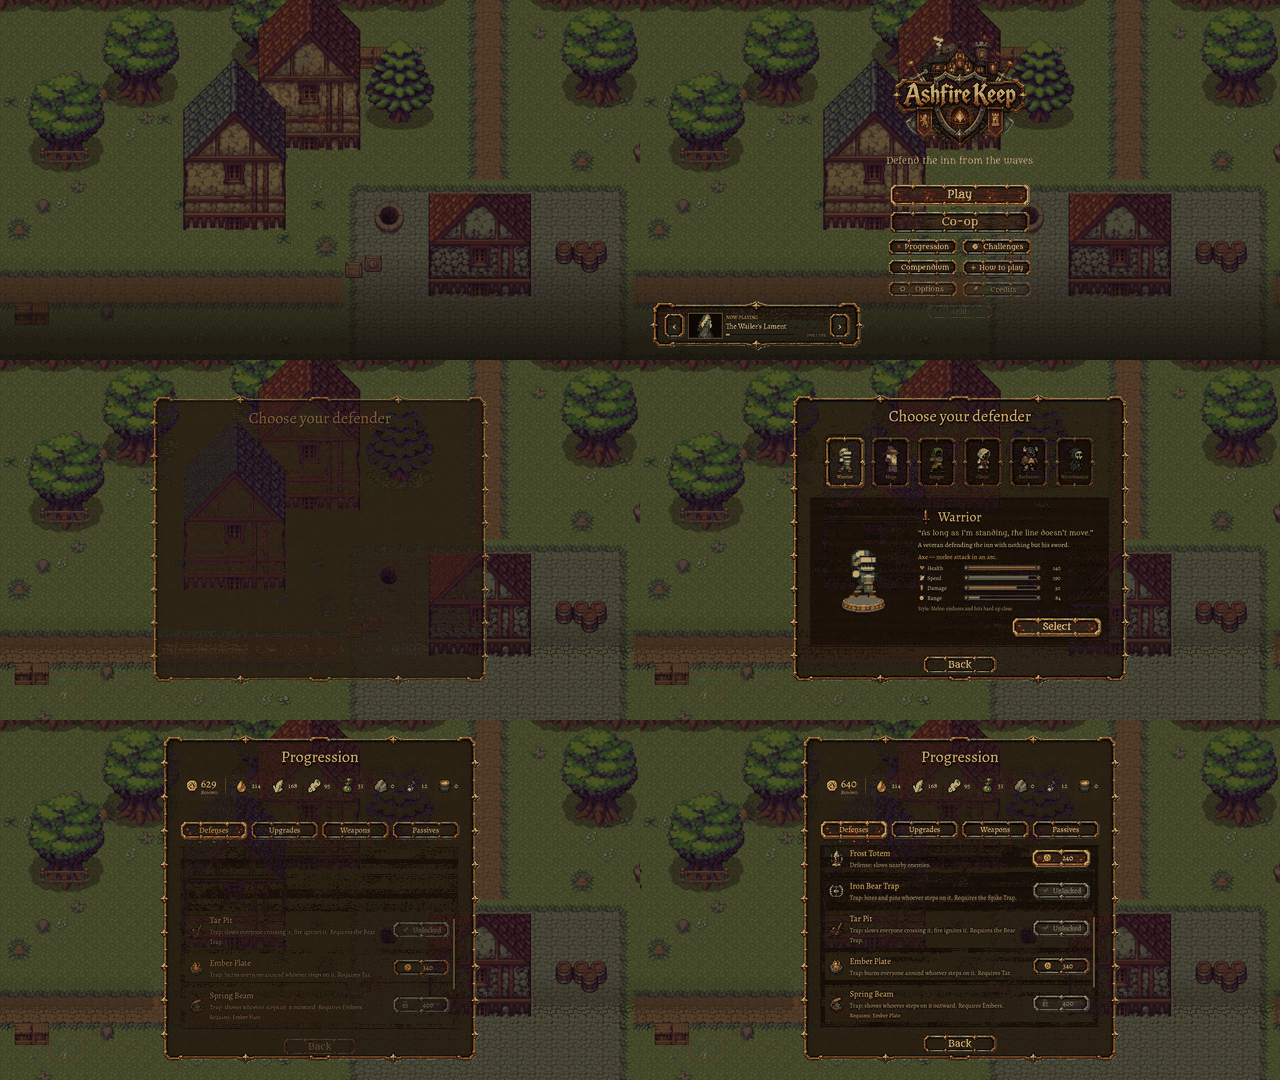
Progression is split into Defenses, Class upgrades, Weapons and Passives. Every row carries the icon of what it buys and the button is the price (or a padlock if something is missing, or a tick if it is already yours); buying is one click and the list stays where you were. Hovering (or focusing with a controller) shows a card with rarity, stacking, real effect and requirements. Renown sits next to the materials, every material has its icon and tooltip, and Weapons and Upgrades have a class filter.


Renewed interface. Buttons and screens with motion (with an option to reduce it), every menu in the same frame, iron toggles and sliders, and dedicated icons for defenses and traps. A main menu with hierarchy, map selection with thumbnails and the difficulty in colour, Options split into sections, and Challenges with groups and progress.
HUD. Icon chips at the top (inn, wave, enemies, act), context and event on a banner of their own, a character panel with a medallion and your health number, and an MMO-style boss bar with its debuffs. Cooldowns on screen: below your health, a row with the icon of every ability that recharges and the seconds left, flashing when it is ready; lifesavers get a gold frame while ready, and the Necromancer sees his souls ("7/10"), the Army and how long until a fallen skeleton returns. Hovering shows the ability's name.
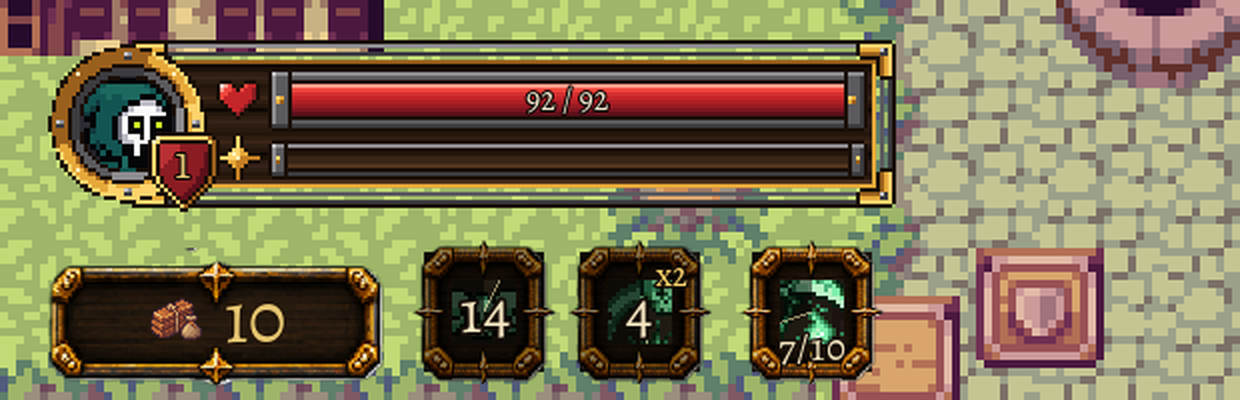
Lifelines at a glance. Second Wind shows in the ability row: gold while you have it (with "x2" if you have two) and greyed out once used. With the Cleric in co-op, an 8-second Last Prayer clock appears over a downed ally and the row shows whether it was already used this wave; the Necromancer's Sacrifice dims while you have no living skeleton, since it can't trigger then.
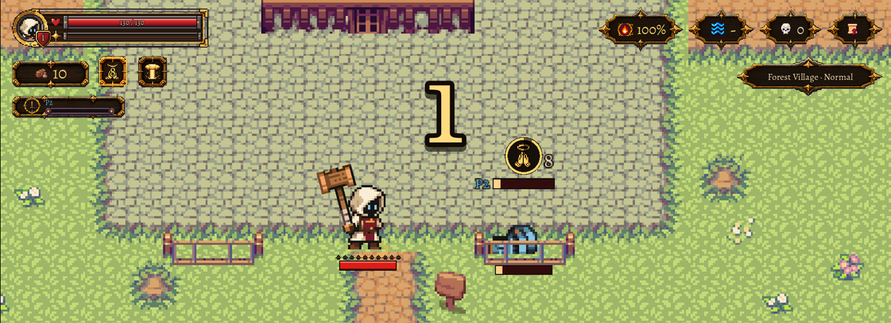

A camera that follows you to the edges. At a side gate your character stays near the center of the screen instead of pressed against its edge; each map is surrounded by its own scenery (forest, snow, mesas, cave rock, castle galleries, graveyard). The play area is unchanged and you can't leave the map.

New enemy health bars: thicker, with a strip that shows how much each hit took off; bosses and minibosses carry their name and a frame of their own. Status effects (poison, bleed, curse, mark, vulnerable, slowed…) show with their icon over every enemy, on a dark plate. The inn's and defenses' health bars are framed and rest on the art. Critical hits get their own number, amber with a "!", and Options › Game lets you pick the number size for damage and healing (Small to Extra large), whether to show a health bar under your character (red, like your teammates') and how taking damage is shown: a red tint on your character, a red screen edge, or both.

Run summary with your class medallion, stats with icons, the materials you earned with their icons, and "Upgrades from this run" with each card's icon, level (×2, ×3) and a short description.


More story. The Compendium tells of the network of sanctuaries, the Wardens who came before and what The Breach is, and reads like pages. New Bestiary with the game's 42 creatures: lore, how each one fights and each boss's role in the siege; it fills in as you play.


Camera zoom (×1, ×1.5, ×2) with the mouse wheel, the controller or a pinch, and a Highlight character accessibility option so you never lose your hero behind roofs, trees or enemies. The starting countdown reads well on every map and no longer covers your character. Every panel fades in, when you fall the full death animation plays before the defeat banner, and there is a new studio intro at launch.
Living menu. Each time, the menus show a random map out of six, with its inn, and all six classes and every enemy and boss pass in front: patrols walking by, chases and fights with their hits and falls.

Refreshed HUD. A Build button with a hammer and your assigned key (or controller button), which pulses when you can afford a new defense. Building notices ("Not enough supplies", "Repairs only between waves") pop up small next to the trap you are placing or above your character, and general notices show in a larger banner at the bottom, with their icon. The stats table, with Character and This run sections, folds with a click or C (rebindable in Options › Controls) and remembers how you left it. Every key in the HUD is drawn the same way.

New act titles. The chapter is announced at the top, with no box: a small "ACT I", the big name, a gold divider and two lines of story, and it fades away on its own. The event card shows up below your character instead of covering it, with the key to continue drawn in (or the controller button, or "Tap to continue"). Each boss's name, the cycles of The Breach, bursts and the end-of-run screen use the same style.

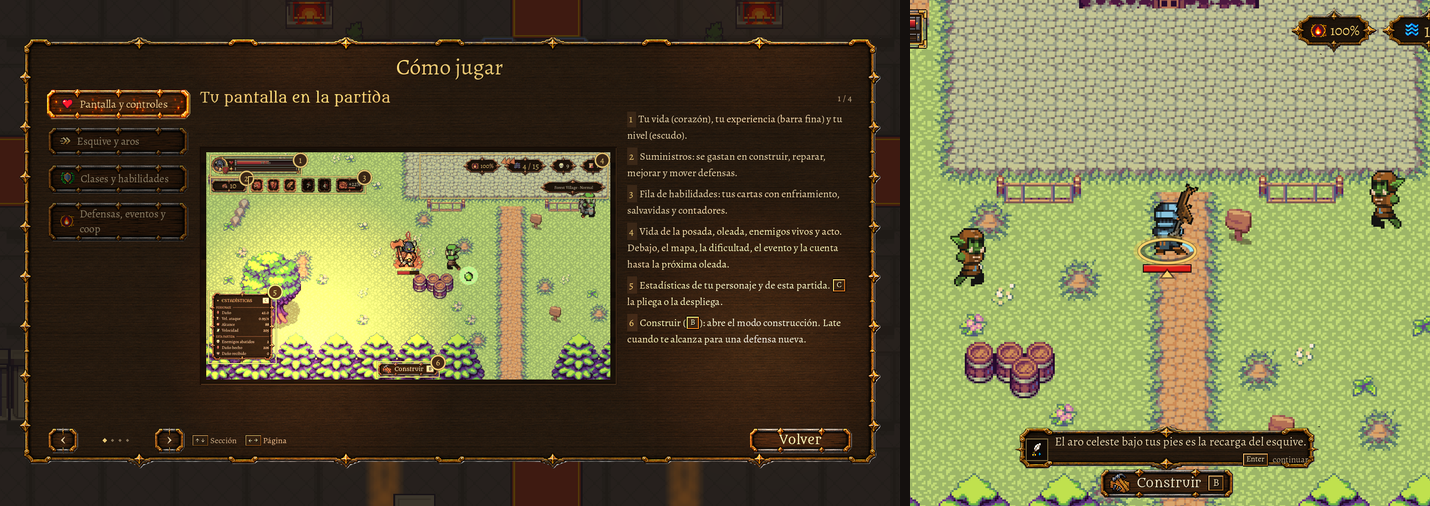
How to Play and new tips. An illustrated guide in the main menu and the pause menu explains the screen, the controls for your keyboard, controller or touch screen, the dodge and what shows under your feet, the six classes with their abilities and lifelines, and defenses, events, bosses, co-op and The Breach. In a run, tips show up the first time each thing happens and highlight in gold the part of the screen they talk about; when playing solo, the game stops while you read and resumes when you close the tip (Enter, A, click or a tap). In co-op they show up between waves, and the next wave waits until everyone has closed them. If you had already done the tutorial, they still show you what is new. You can turn them off in Options › Game.
New music
An original soundtrack with two sides. In a run, industrial metal: one theme per map and one per boss, each with its own groove and the color of its place (flute in the forest, bells and icy wind in Snowbound, zurna and darbuka in Sunscar, dripping water and kalimba in the Gloomspore cave, organ and war drums in Greywall, a funeral bell and the Dies Irae in The Breach), plus a closing hit when the boss falls. In the menu, the selection screens and the pause menu, thirteen calm medieval pieces play at random, each with its own name; a music player in the bottom-left corner shows which one is playing, with the art of its map or boss and a bar with its progress, and lets you skip back or forward. If it does not fit on screen, it folds into a small tab with a play icon at the side.

Every ability of the six classes has its own sound, and Shockwave, Arrow Rain and Second Wind, which were silent, can now be heard.
Balance
- 12 seconds between waves (was 8). The orc's whole body can now be hit (arrows used to pass through its head).
- Enemies that are closer to the inn than to you no longer peel off to chase you, even if you hit them from afar: they keep going for the inn unless you're right next to them. This applies to every enemy, bosses included; bosses' ranged attacks still target you.
- Four new enemies on the original maps, the Skeleton Crew (skeleton, fast skeleton, warrior and sorcerer), with the same numbers as their living counterparts.
- Warrior's War Cry: it triggers with an enemy within 170 px and slows and taunts everyone within 260 px (both used to share one radius); a golden ring opens to show its reach.
Fixes
- The Warrior's Shockwave now bursts where the axe lands, not at his feet; with Unstoppable Charge, it bursts where the charge ends, not where it started.
- Enemies no longer stand still in the open (three different causes); ranged enemies work out their line of fire with the real shape of their projectile, do not shoot through obstacles and walk straight to the defense they are attacking. If something unbreakable blocks their shot, they move around it instead of pushing against it.
- Enemies no longer get stuck behind houses, trees and walls: they now walk around the map's obstacles instead of bumping into them, and if one still gets stuck, it reappears at one of the gates.
- The earth wave of the bosses' ground slam is drawn beneath the characters, like the aura, and no longer covers them.
- Manual aiming with a controller or on mobile: an arrow at your character's feet shows where you are aiming, and the attack corrects slightly towards the enemy closest to that direction. With a mouse it stays exact.
- The Mage's twin projectiles home in slightly on their target, and the Ranger's double shot aims at the same enemy.
- The game no longer overworks your graphics card: new FPS limit option in Options › Video (30, 60, 120 or your screen's refresh rate; 60 by default), and it drops to 10 FPS on its own when minimized or in the background.
- Card text is no longer cut off; Sweeping Blows says what it does for your class.
- When leveling up, a card's detail panel no longer covers it: it opens beside, above or below it, wherever it does not overlap any card, at any resolution.
- Options: Apply and Back always stay in view even with a larger interface.
- With a larger interface or on small screens, every menu fits: the main button and Back always stay in view and, if a list does not fit, it scrolls on its own following the controller. Credits can be scrolled with a controller.
- Tooltips that show up when you hover a button use the game's style and are easy to read.
- Picking a trap by clicking its card no longer places it under the card.
- In the prologue, holding Escape returns to the menu instead of starting the run.
- Snowbound Outpost: act III snow no longer looks like sand, the lake has its deep water and the stump that floated on the ice sits on solid ground.
- The Ranger's arrow is real pixel art and its sounds start in sync; her bow always faces the same way she does, also when walking up or down; a defense's health bar rotates with the defense.
- The barricade and the stone wall look different when upgraded: the barricade gets crossed planks bound in iron and the wall becomes solid, instead of just a golden tint.
- Nine languages, all new text included.

Thanks for playing. Co-op reports and difficulty reports from the higher maps are the ones that help us most right now.
Depot changes
| Depot | New manifest | Previous manifest |
|---|---|---|
| 5009541 | 2455268786614642914 | 1423233119625640829 |