Hello Kerbonauts. I'm Ghassen, also known as 'Blackrack,' the newest graphics programmer on the team. You have no doubt noticed that we have improved the atmosphere rendering in v0.1.5.0. Today I’m going to share with you some insights into those improvements, as well as some of the improvements that are going to be in v0.2.0.0.
Inspecting the Atmosphere
This is how our atmosphere appeared in v0.1.4.0 on Kerbin:
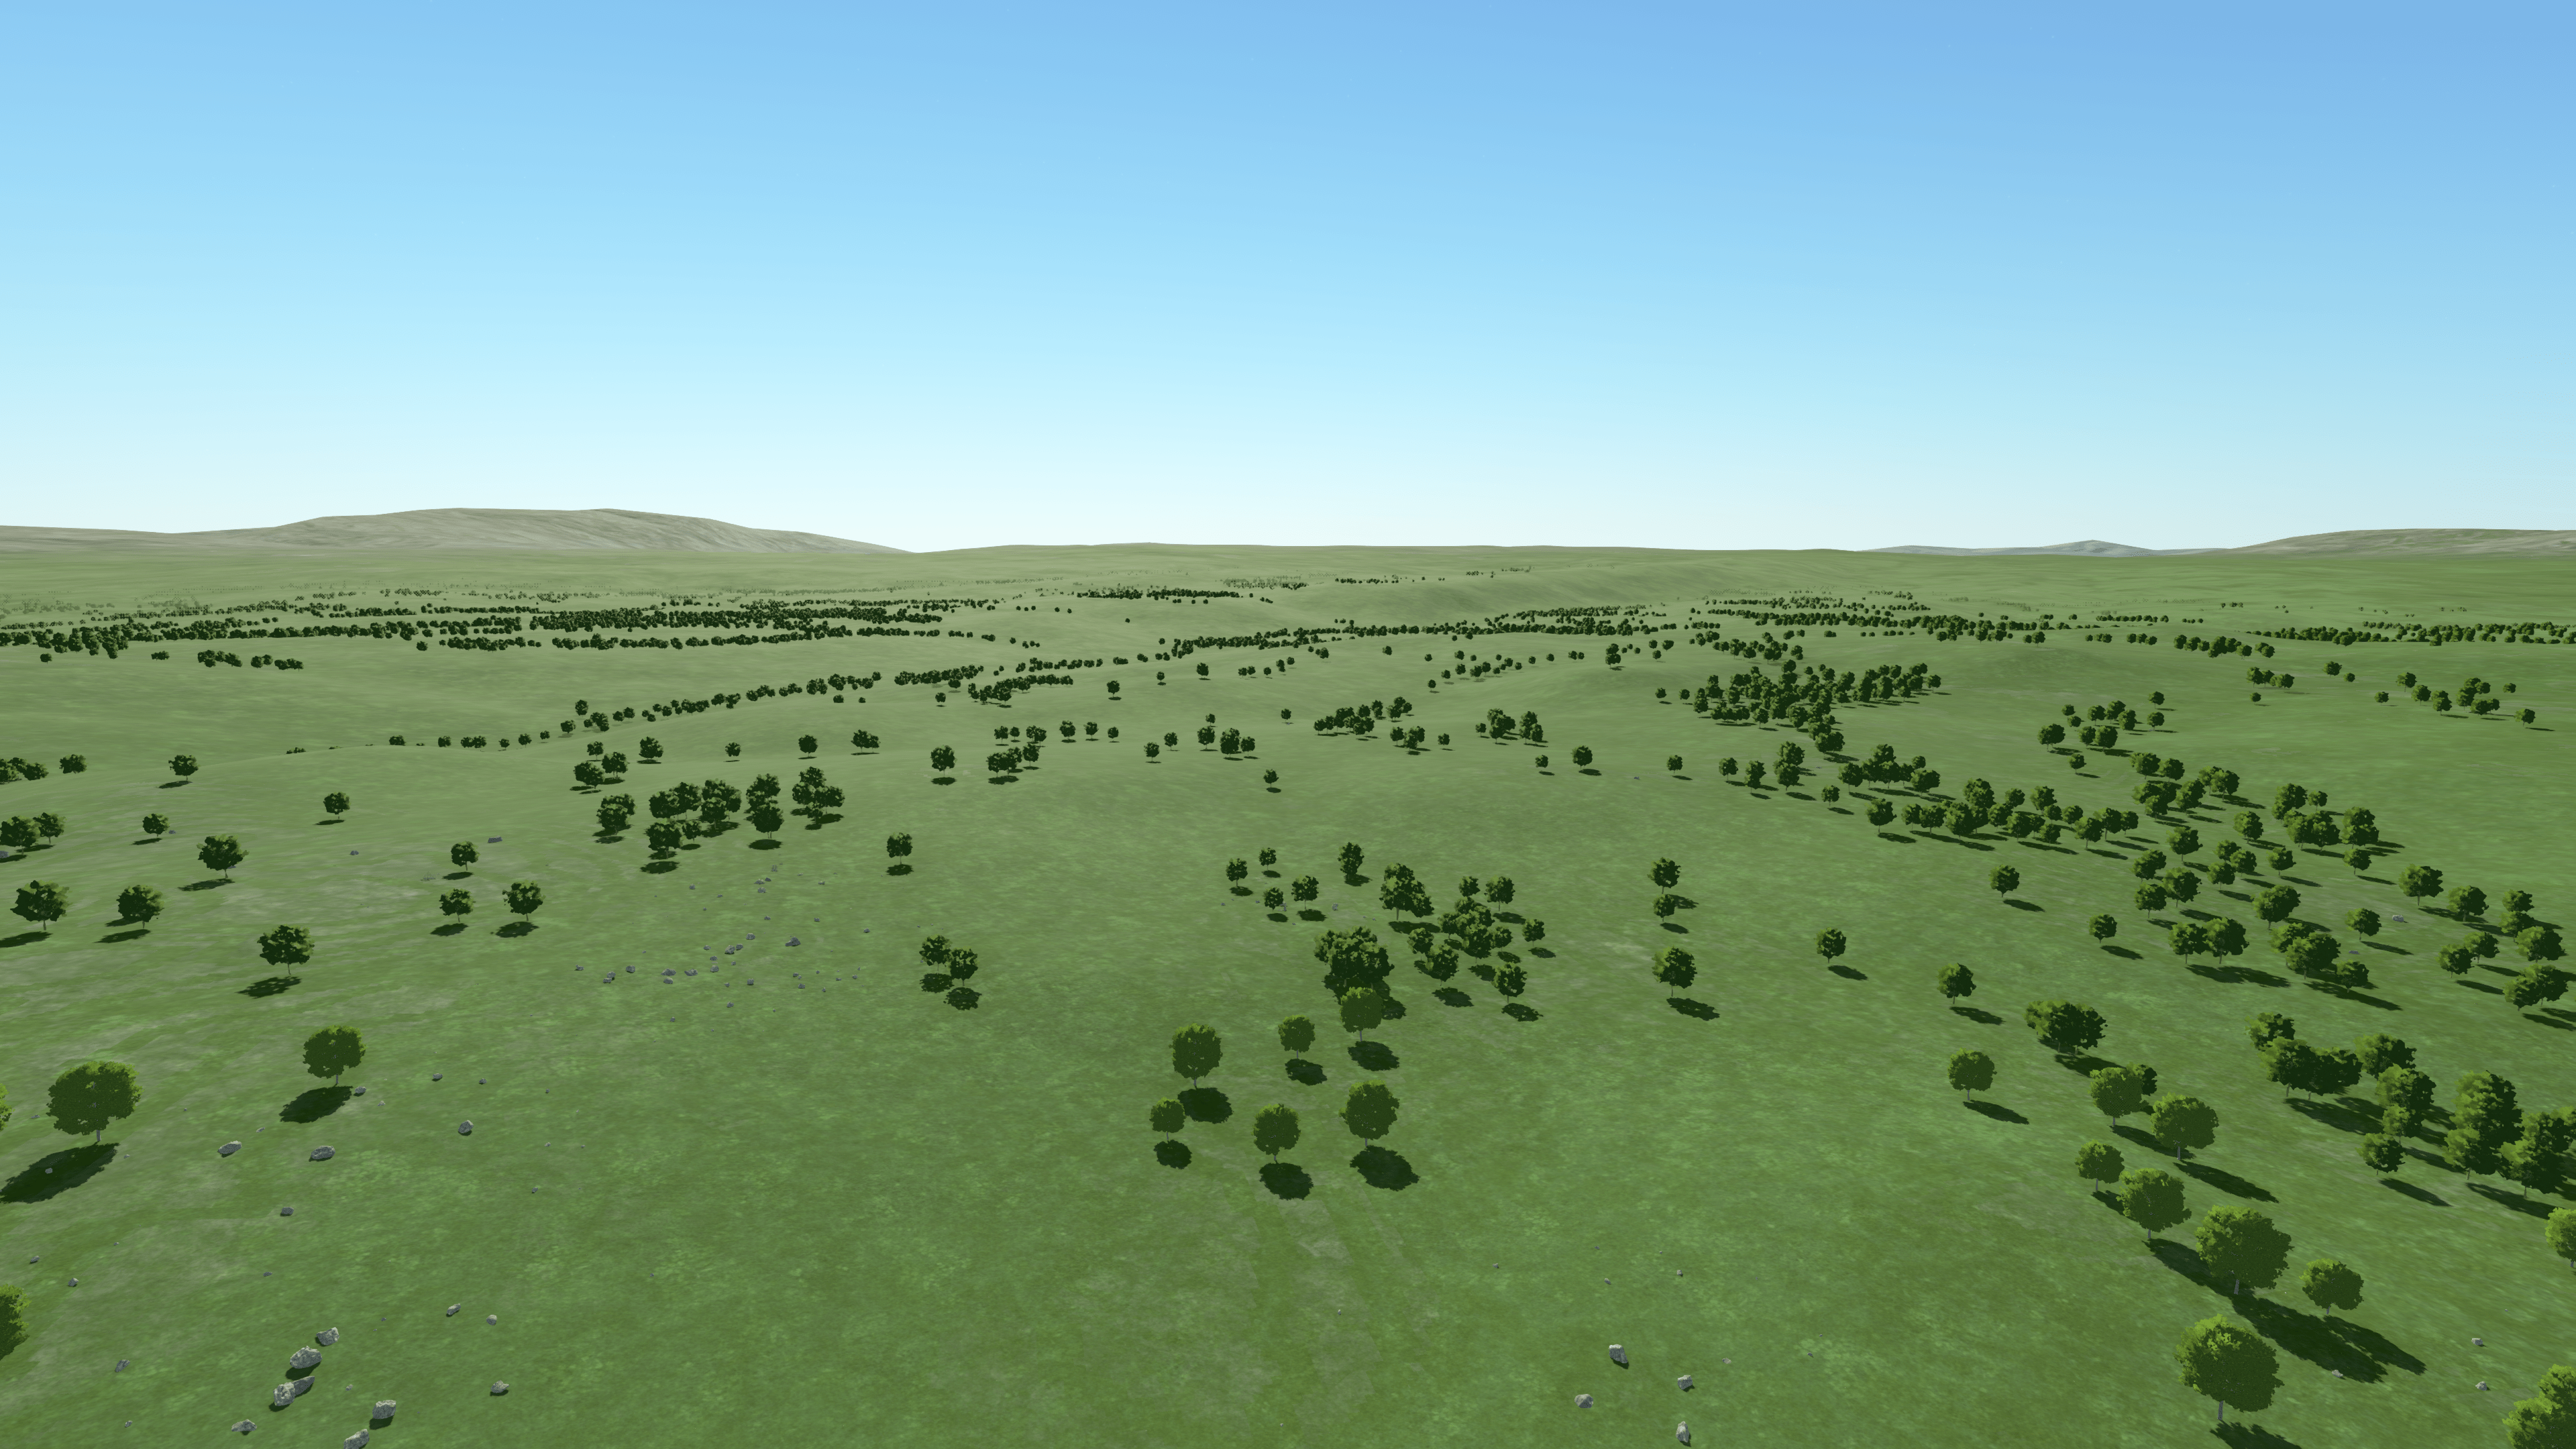
We can see a very nice-looking sky. However, the effect is very subdued on the terrain, we have trouble reading the terrain topography: It is difficult to tell what we are looking at in the distance and the sense of scale escapes us. Are those mountains? Are those hills?
Cut to v0.1.5.0, we can immediately see a big improvement in the scene's readability.
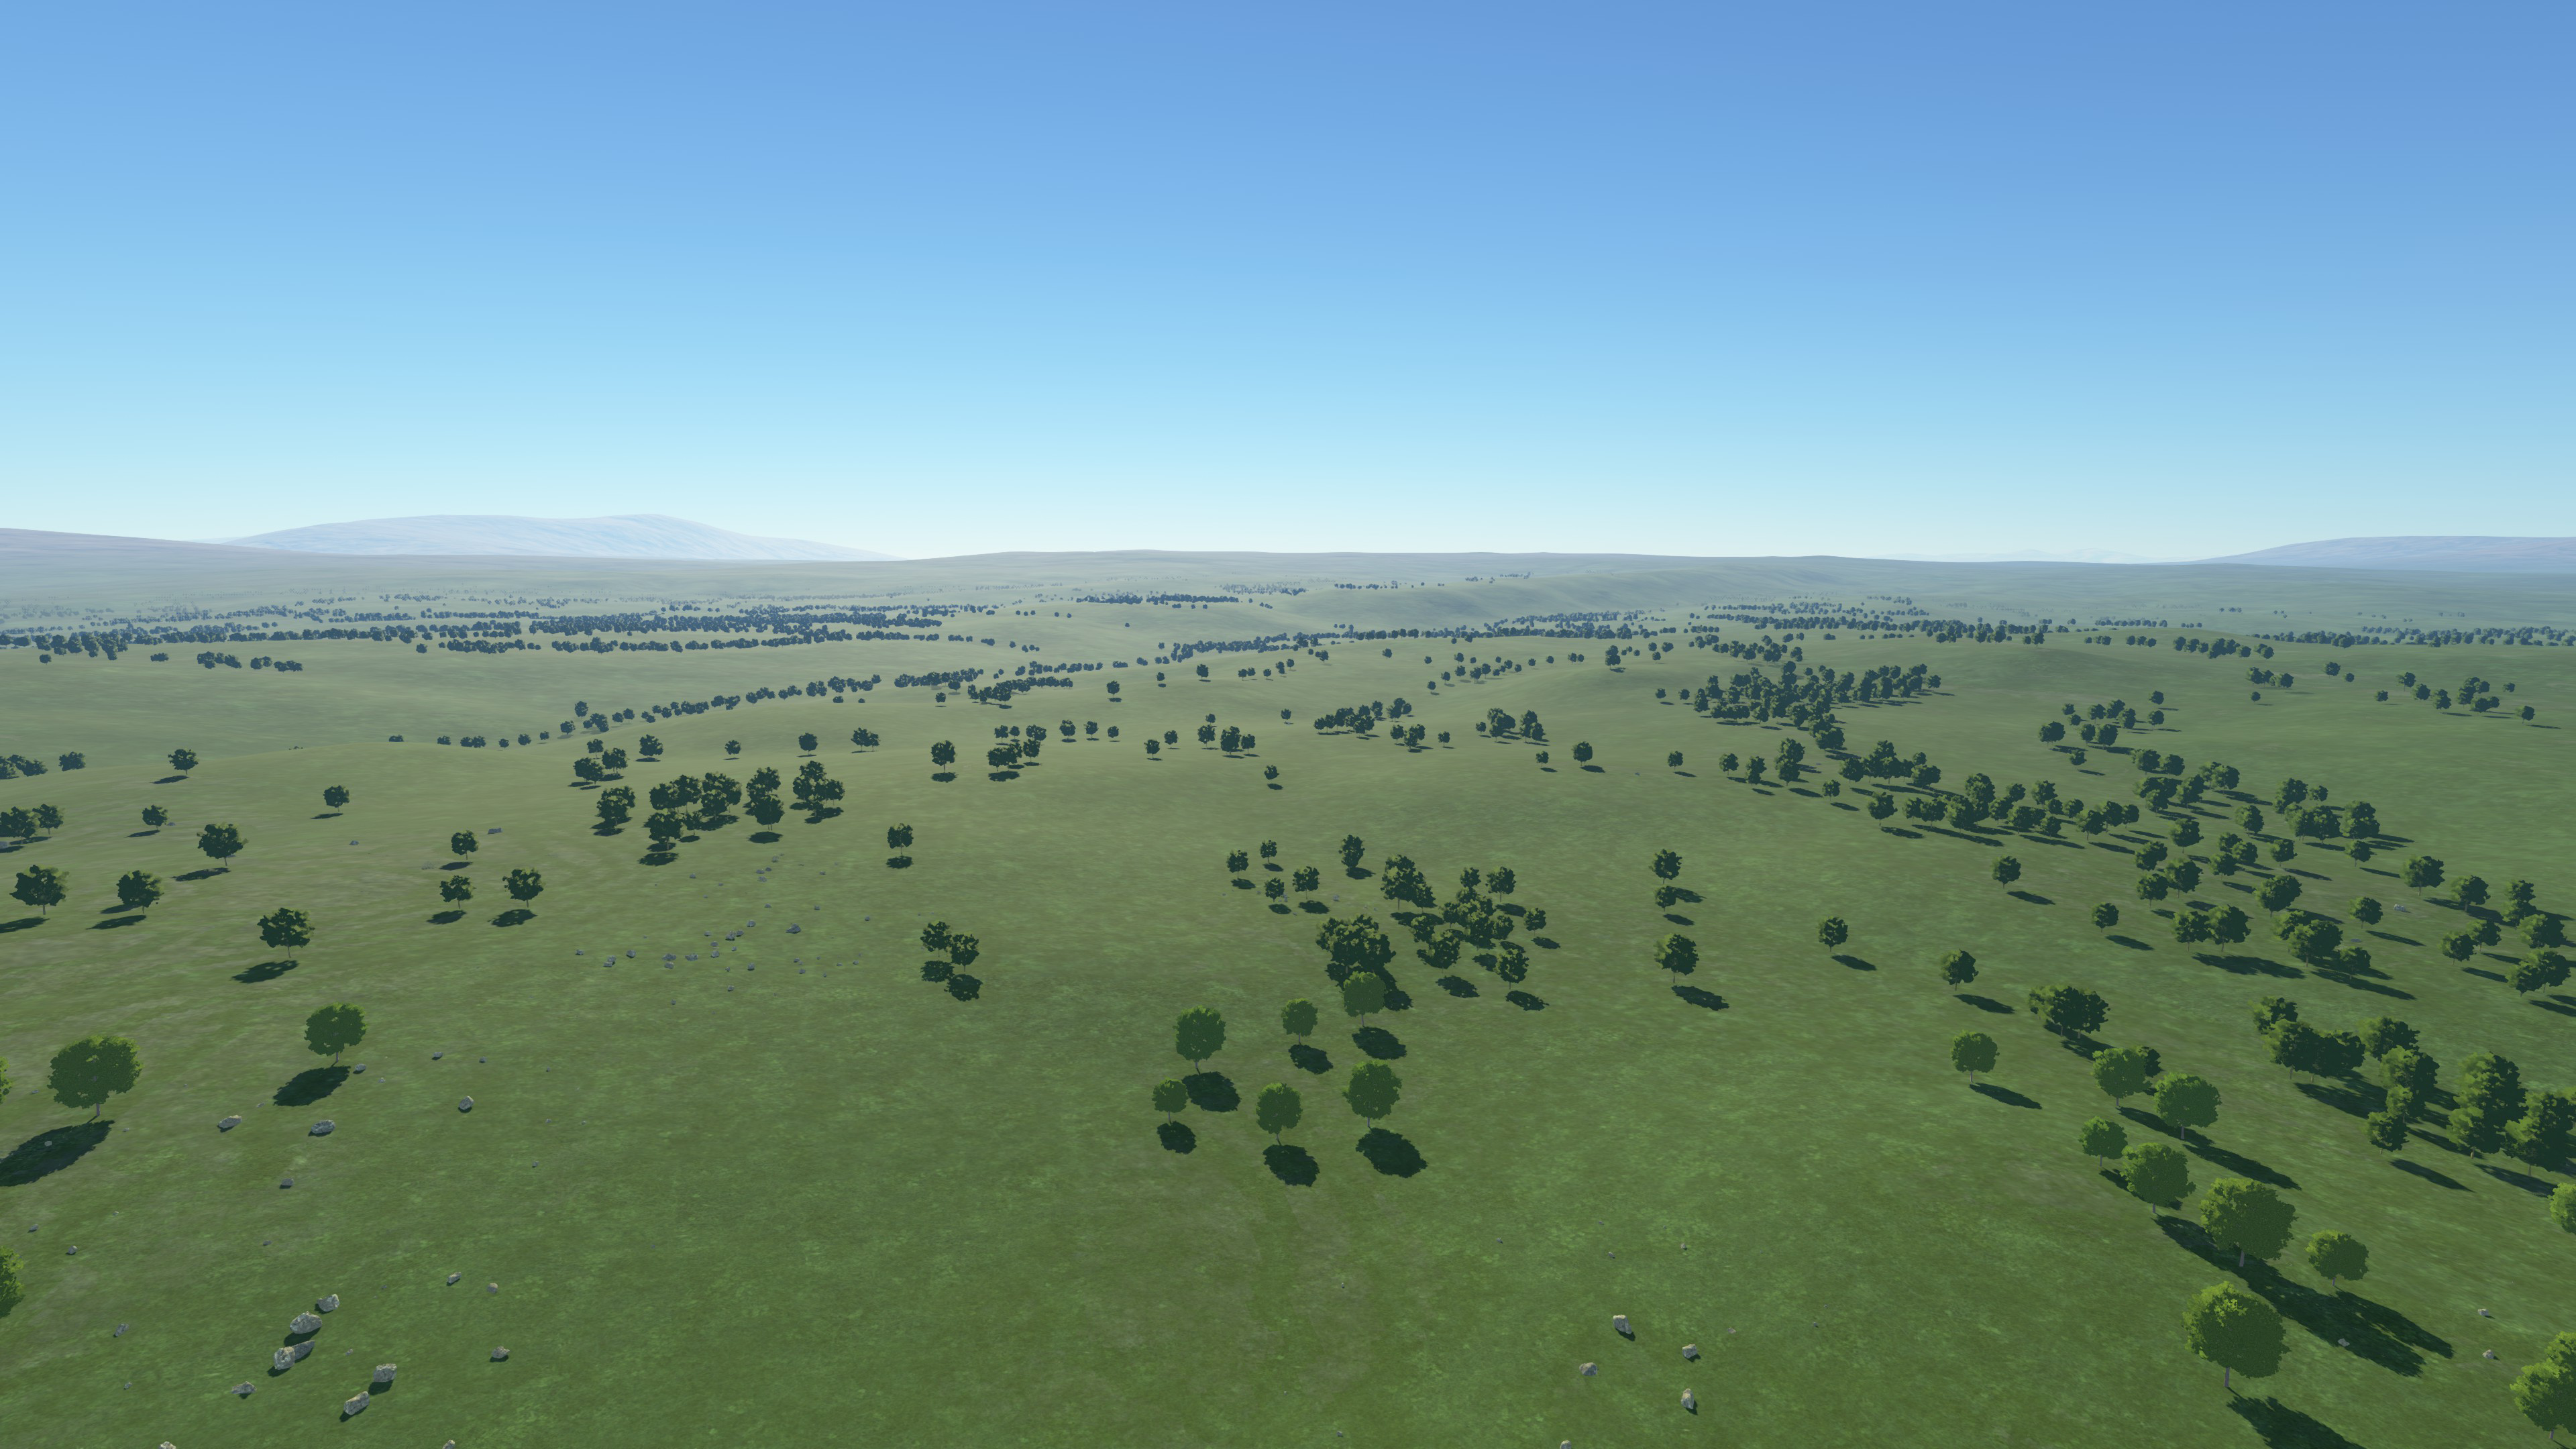
We can now immediately get a sense of how far away things are and we get a better sense of scale. This is what’s known as aerial perspective.
How the Atmosphere is Rendered
We are using a precomputed atmospheric scattering method which is standard nowadays in computer graphics, and popularized by Eric Bruneton.
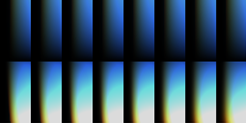
It is precomputed, meaning all the heavy calculations involved in simulating how light scatters through the atmosphere are done once for all possible altitudes and sun angles, and then stored in compact and easy to access tables. The latitude and longitude of the observer on the planet does not matter because we can use symmetries and effectively just change the altitude and sun angles to get the scattering at any viewpoint.
These tables can then be used to display the effect in a very performance-friendly manner when the game is running. These are known as look-up tables. This what some of the slices in our look up tables look like:
How Aerial Perspective is Rendered
The look-up tables I’ve described earlier can be used to find the colour of the sky for any given viewpoint inside or outside the atmosphere, as well as how much the atmosphere occludes celestial objects behind it (this is known as transmittance or also extinction, it describes how much of the original object’s light is transmitted and makes it to the observer).
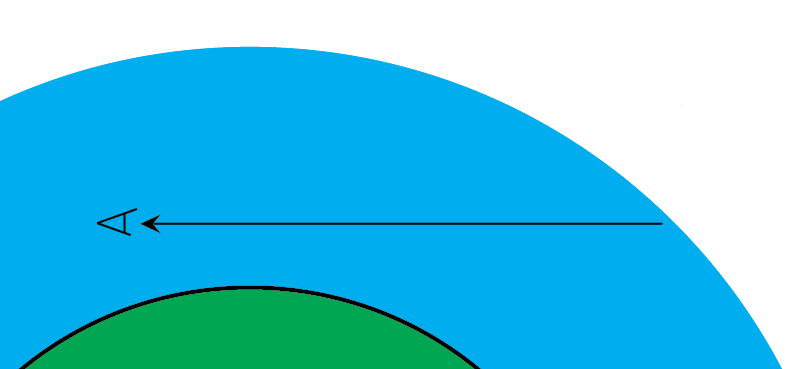
The look-up tables only allow us to get the light scattered towards us from the edge of the atmosphere, and assume we are always looking towards the edge of the atmosphere, so we cannot use it to directly to get the colour of the atmosphere up to an object. This is because the look-up tables would otherwise become impractically big and would eat up our memory budget.
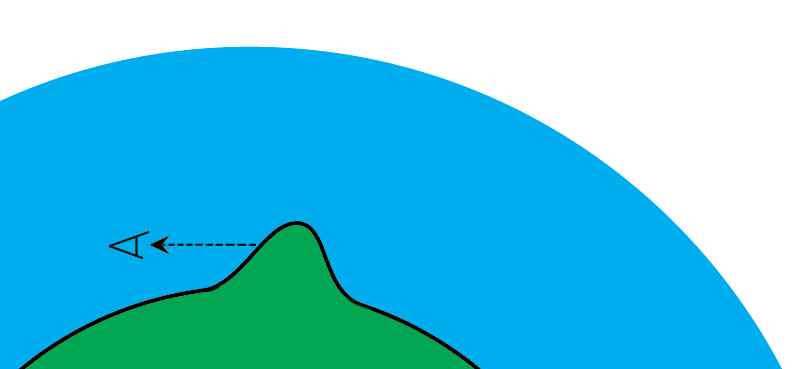
However, since the look-up tables allow us to get the colour of the sky from any viewpoint, we can re-express the scattered light up to a point/object as the difference between two samples to the edge of the atmosphere, starting from different positions.
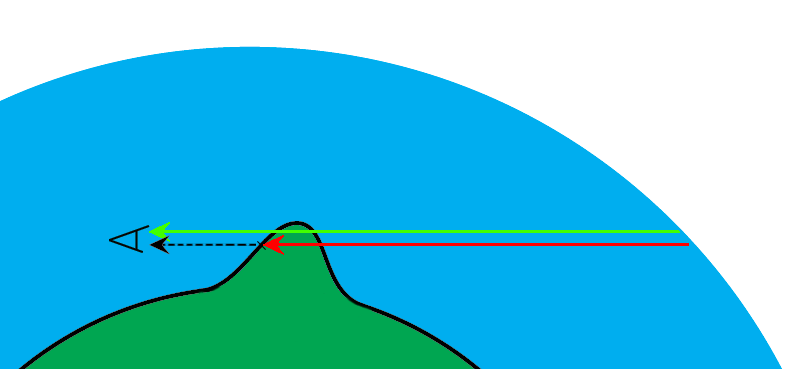
We also must apply transmittance to the observer to second sample (in red on the diagram) for everything to be correct.
Putting It In-Game
So now that we know the method to render aerial perspective, we can plug it in-game, and see what we get. Behold:
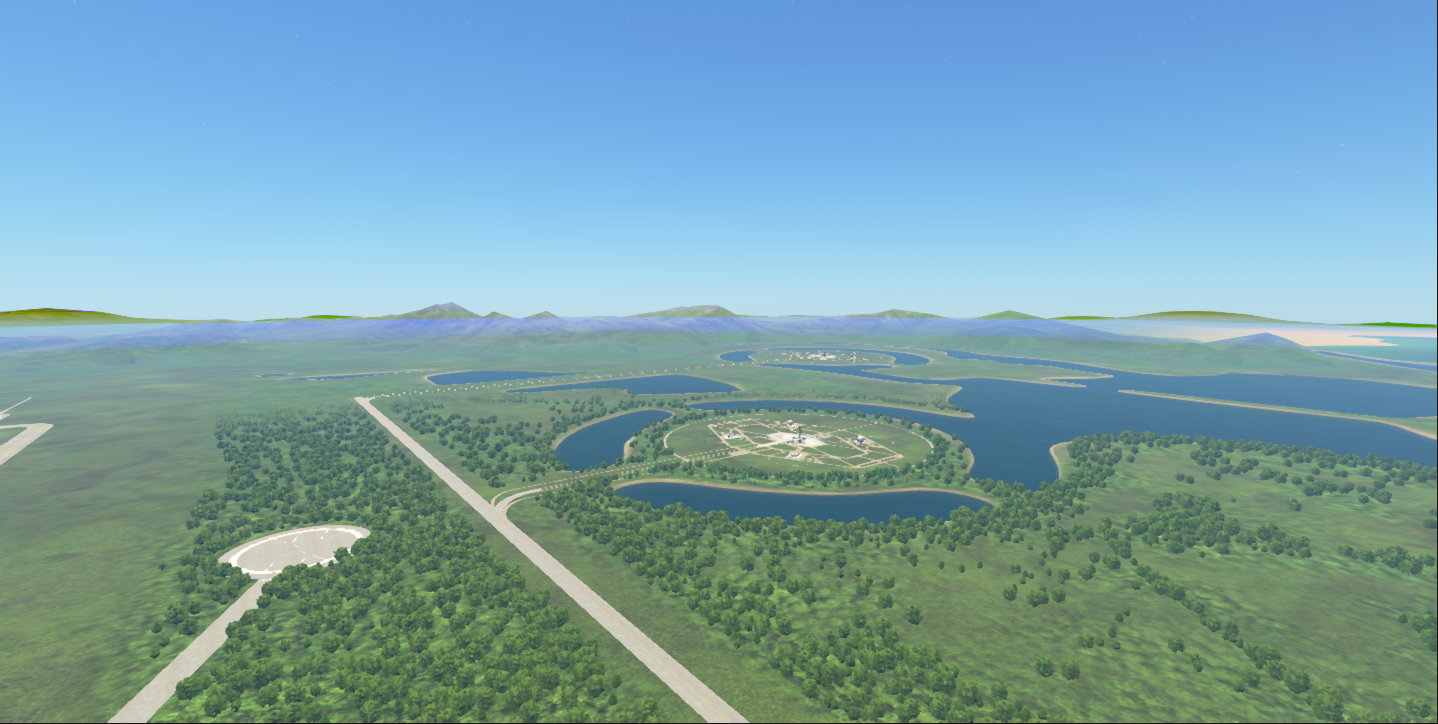
Hmm that looks really strange around the horizon, so what's happening here?
Recall that we are using look-up tables, these are loaded on the graphics card as textures, and they have limited resolution and precision (bit depth). The aerial perspective method described earlier only makes precision issues worse by taking the difference between 2 samples, especially on high variance areas (typically around the horizon) where any imprecisions are amplified.
The way to deal with this is to first inspect the look-up tables, see if anything is stored in low precision textures or with any lossy compression, and use high precision instead where needed typically (16-bit and 32-bit per channel floating point textures).
After that, we can then change the parametrization for how samples are distributed across the look-up table to maximize resolution where it is needed. The original paper offers a nice way to distribute samples, but we found that it works best for physical settings matching those of Earth, but not for some of the settings used at Kerbal scale.
Finally, we review all the lossy transformations in the math and try to minimize any loss of precision and guard against various edge cases.
This is where most of the engineering effort in implementing precomputed atmospheric scattering is spent. Right now, we have gotten our implementation to a good place, however the inherent limitations of the method means that in the future we will move to a different, non-precomputed method which doesn’t suffer from these issues and would allow us greater flexibility.
The Importance of Mie Scattering
We simulate Rayleigh scattering (air particles), mie scattering (water droplets and aerosols) and ozone absorption, each of these is important to represent a different effect and render all the kinds of atmospheres we want.
Mie scattering has a particularly noticeable effect and can be used to make atmospheres look foggy and cinematic, all the while keeping a realistic look. I took these screenshots early in testing the atmosphere changes to illustrate the difference increasing mie scattering makes to a scene:
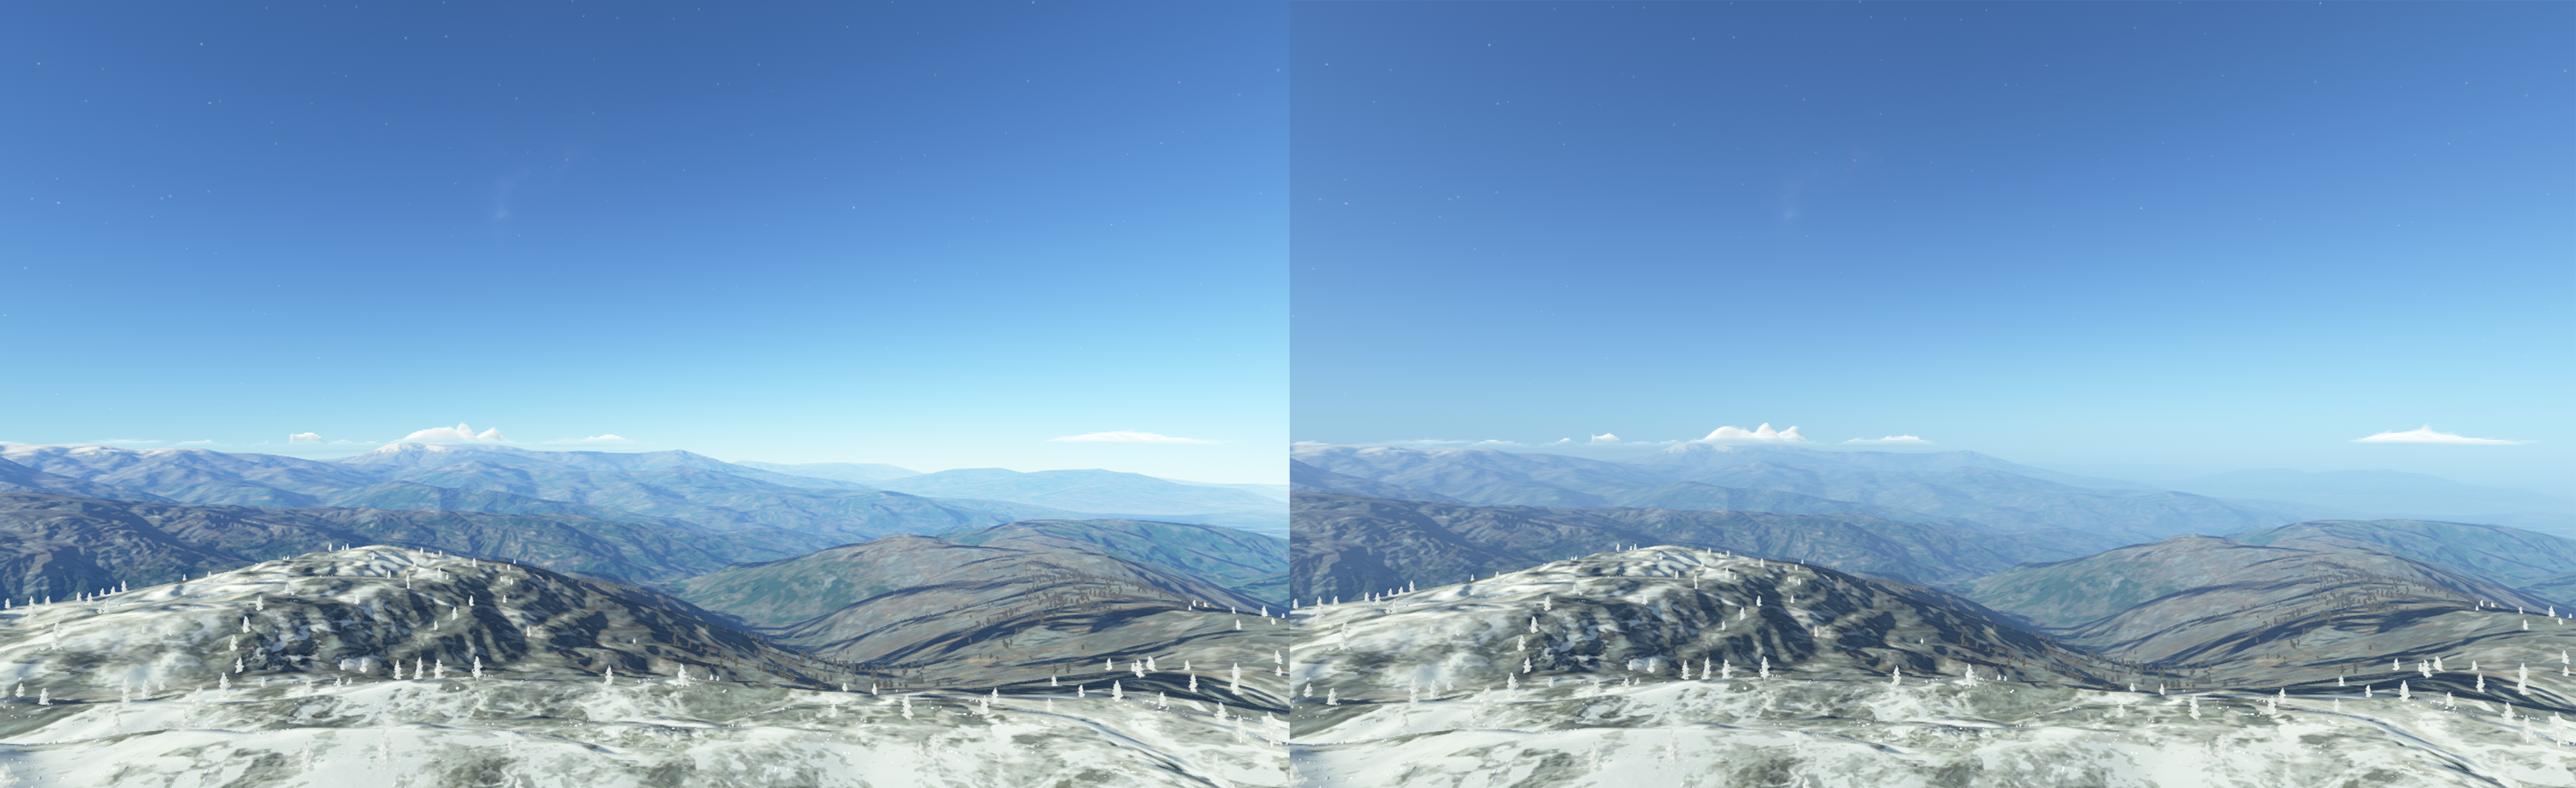
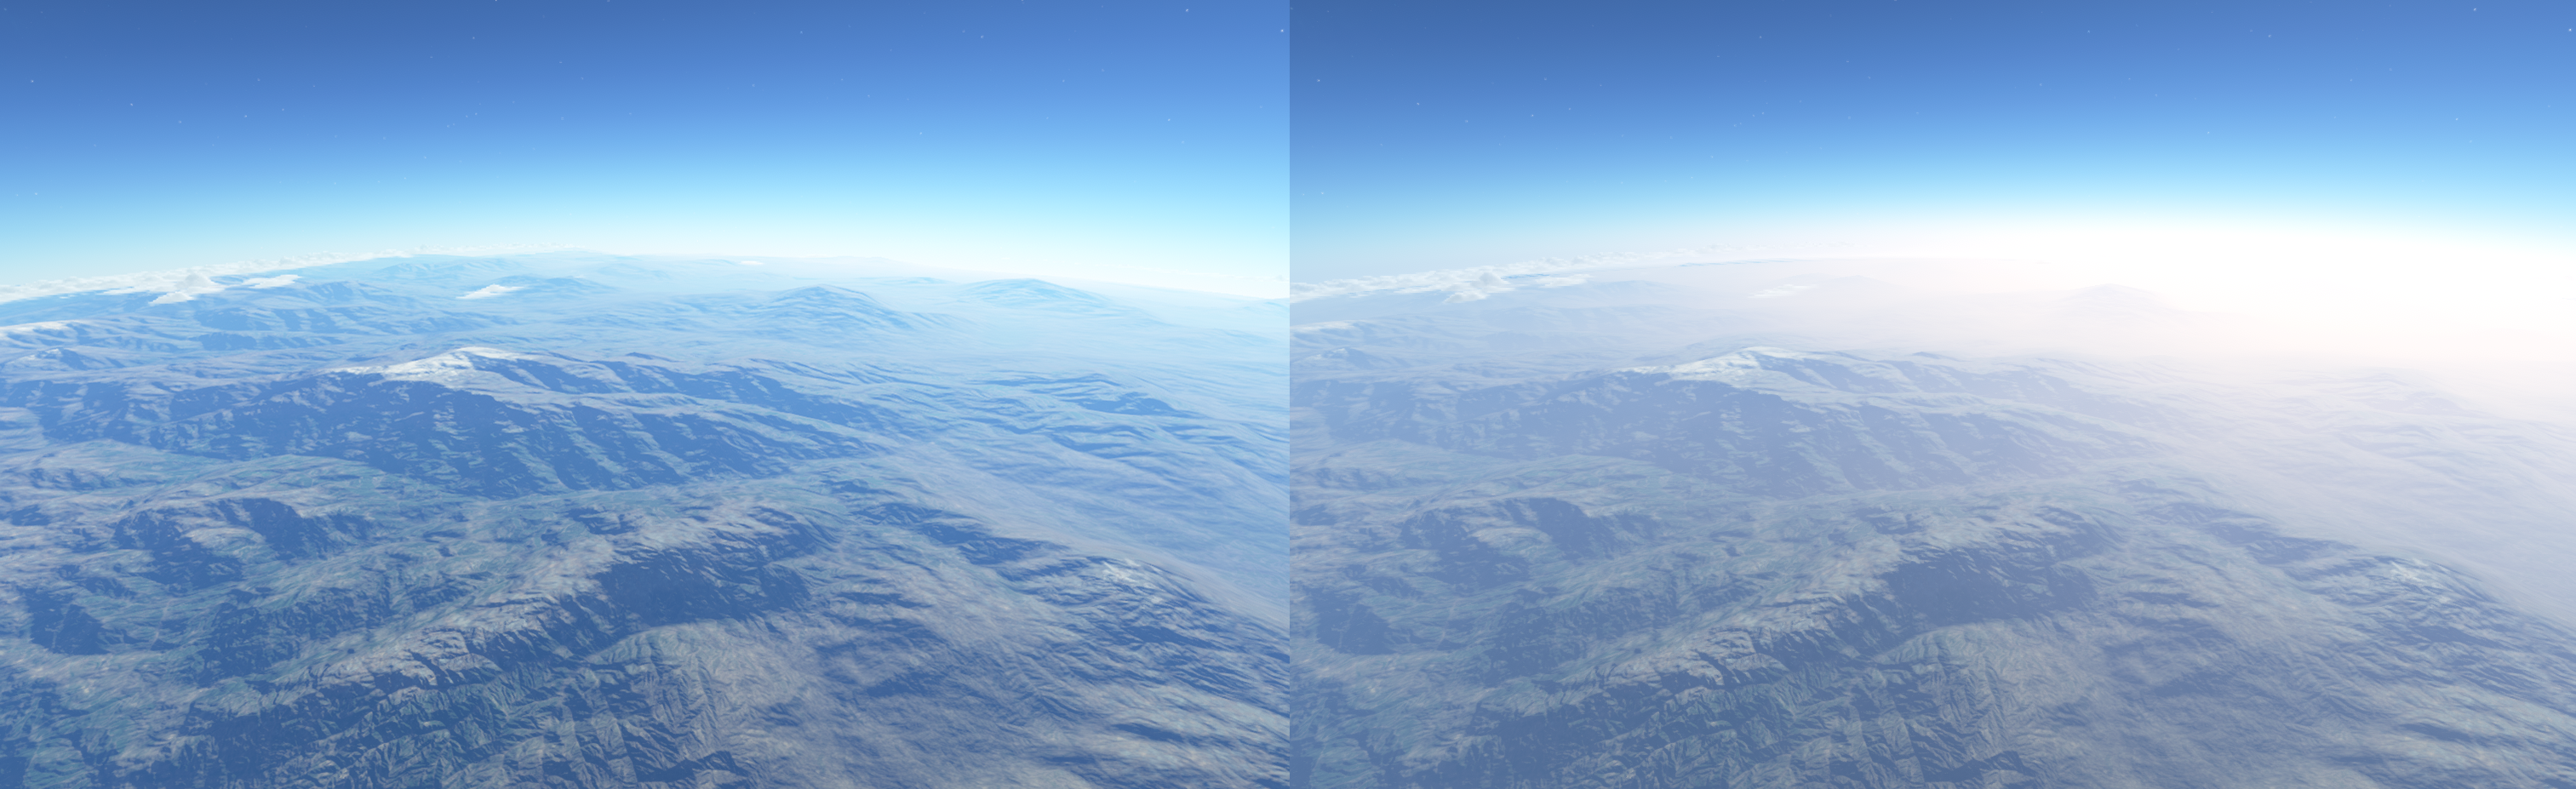
In the end we went with a relatively subdued setting on Kerbin and a nice heavy setting on Laythe to set them apart, also as a reward for flying to Laythe.
Atmosphere as Lighting
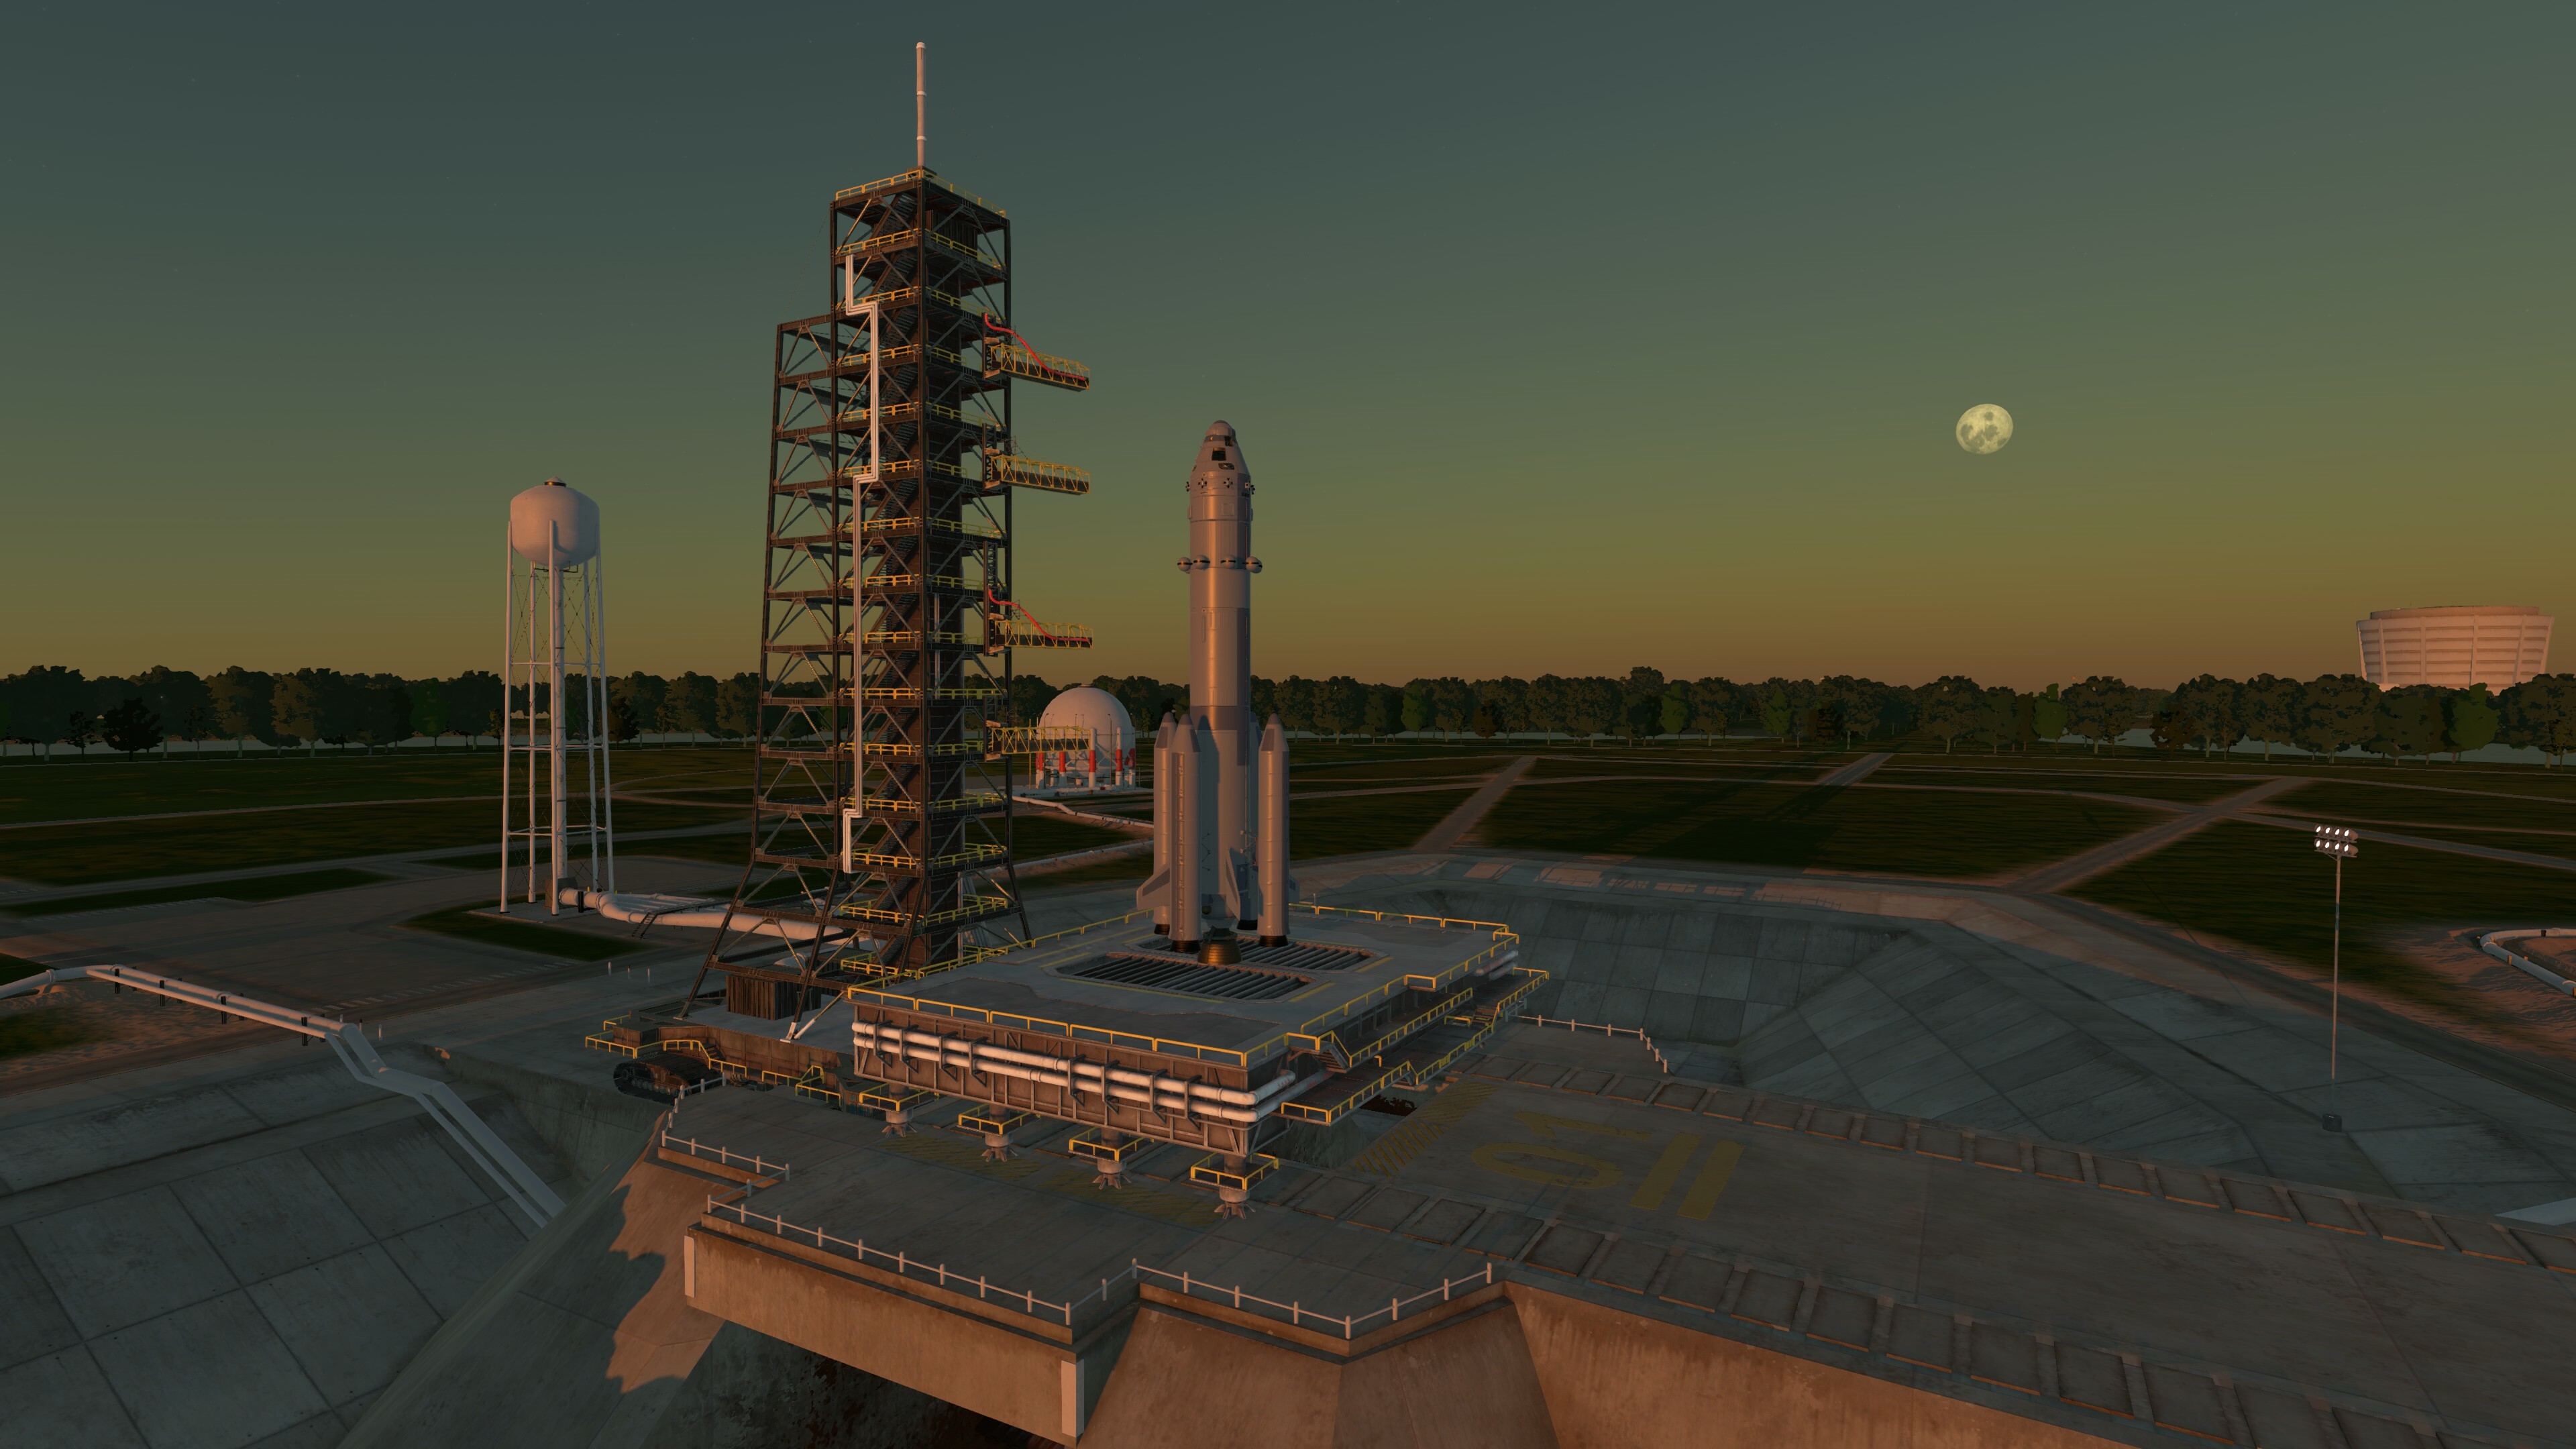
Recall that we have the transmittance that we discussed earlier as the part of light that reaches the observer and objects in the atmosphere. We can now use that to light objects, by applying it to sunlight, this gives us the very nice and soft lighting you can see around sunsets and sunrises:
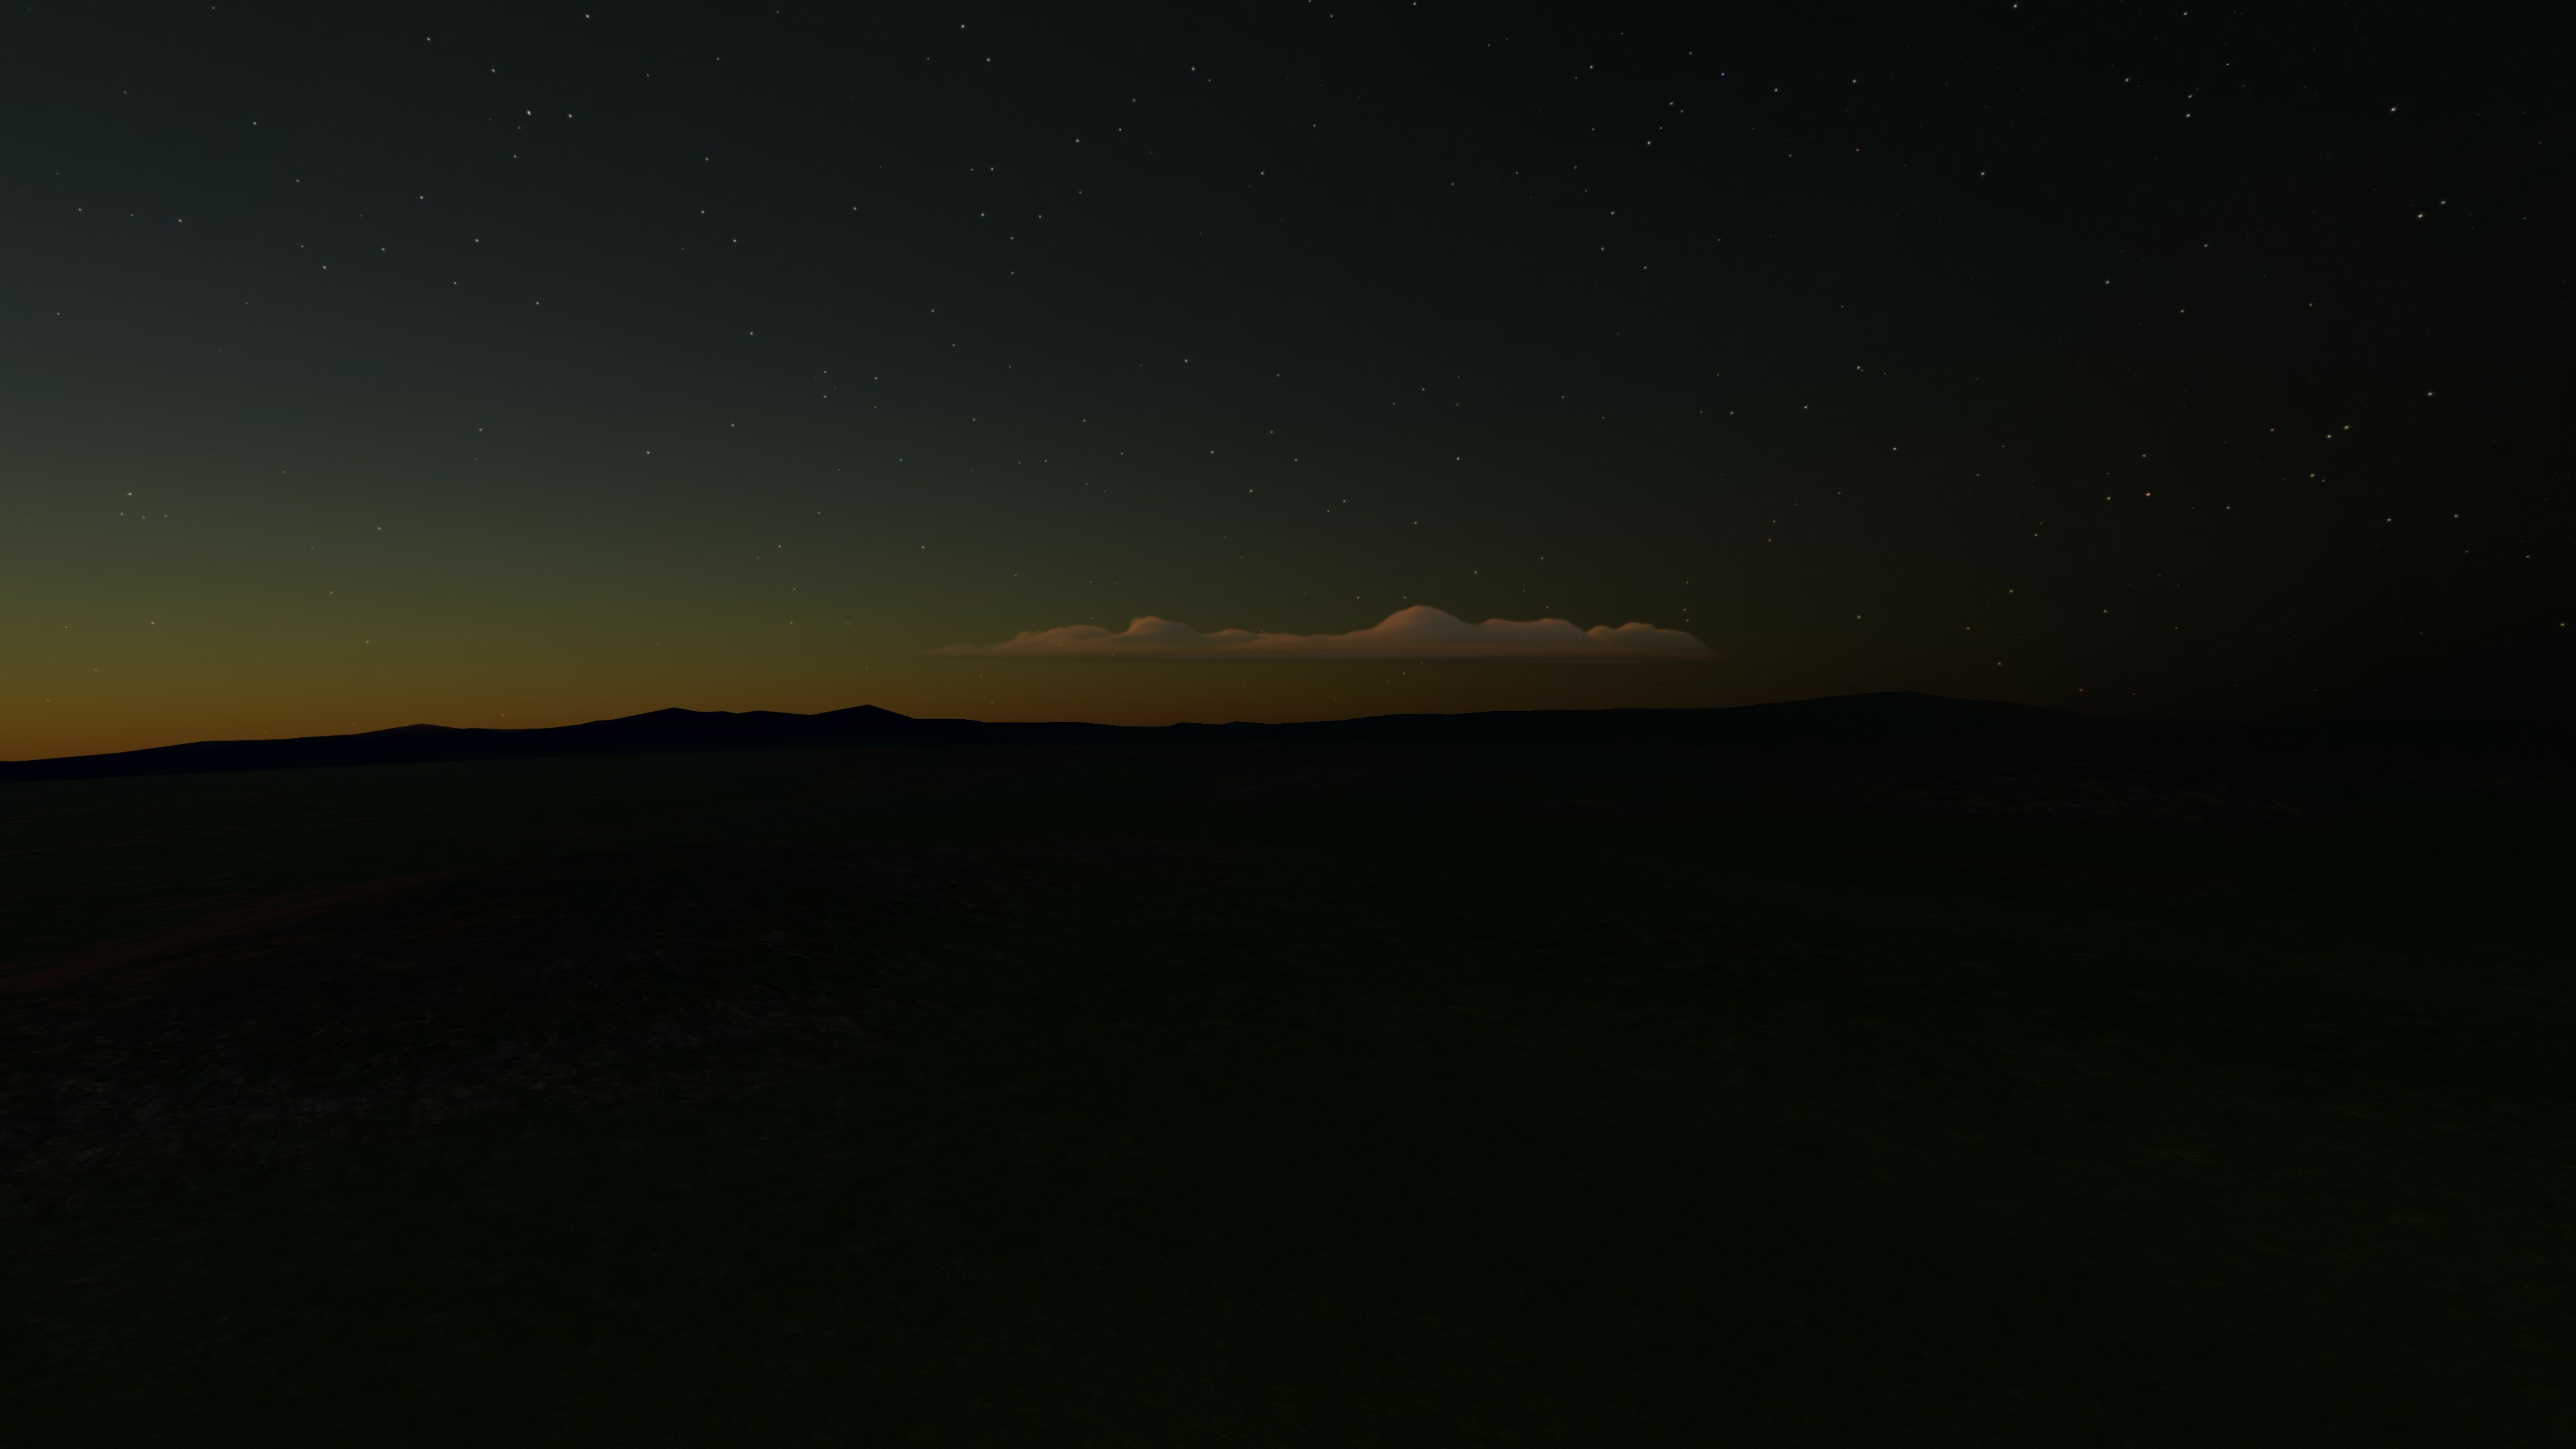
We can also use the transmittance on the clouds, notice how areas in direct light can get a nice reddish color, while areas not in direct light get ambient light, and we get a very nice contrast between the reddish transmittance and the faint bluish ambient:
Using the atmosphere to do lighting also simplifies artists workflow, as the alternative was to try and approximate the different lighting parameters at different times of the day via various settings and it was very difficult to make the clouds look “right” at every time of day. Now we have less work to do and it looks better and more coherent.
Speaking of clouds, next we will discuss of some of the performance improvements coming in v0.2.0.0, but first let’s see how clouds are rendered in more detail.
How Clouds are Rendered
Modern clouds are rendered via raymarching, a technique that involves “walking” through a 3D volume, incrementally sampling properties like density and colour as we move along, and performing lighting calculations. This method provides a more accurate and visually appealing result compared to traditional rendering techniques and is very well adapted to rendering transparencies and volumetric effects. This figure shows in red all the samples we have to do for a single ray/pixel on-screen:
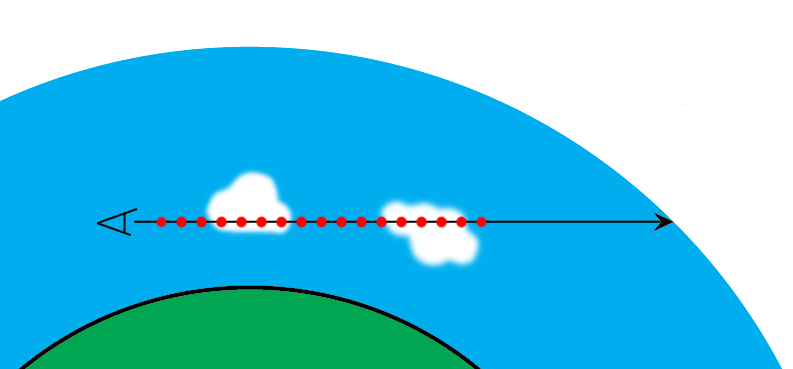
Because of the number of samples we must take during the raymarching process, it is very demanding performance-wise. A solution to this it to render at low resolutions and upscale.
Temporal Upscaling
Temporal upscaling was introduced in v0.1.5.0, the idea is to render a different subset of the pixels every frame. This is similar to checkerboard rendering if you’re familiar with the concept but generalized and not locked to half resolution rendering. This diagram shows how 4x temporal upscaling works, a full resolution image is reconstructed over 4 frames:
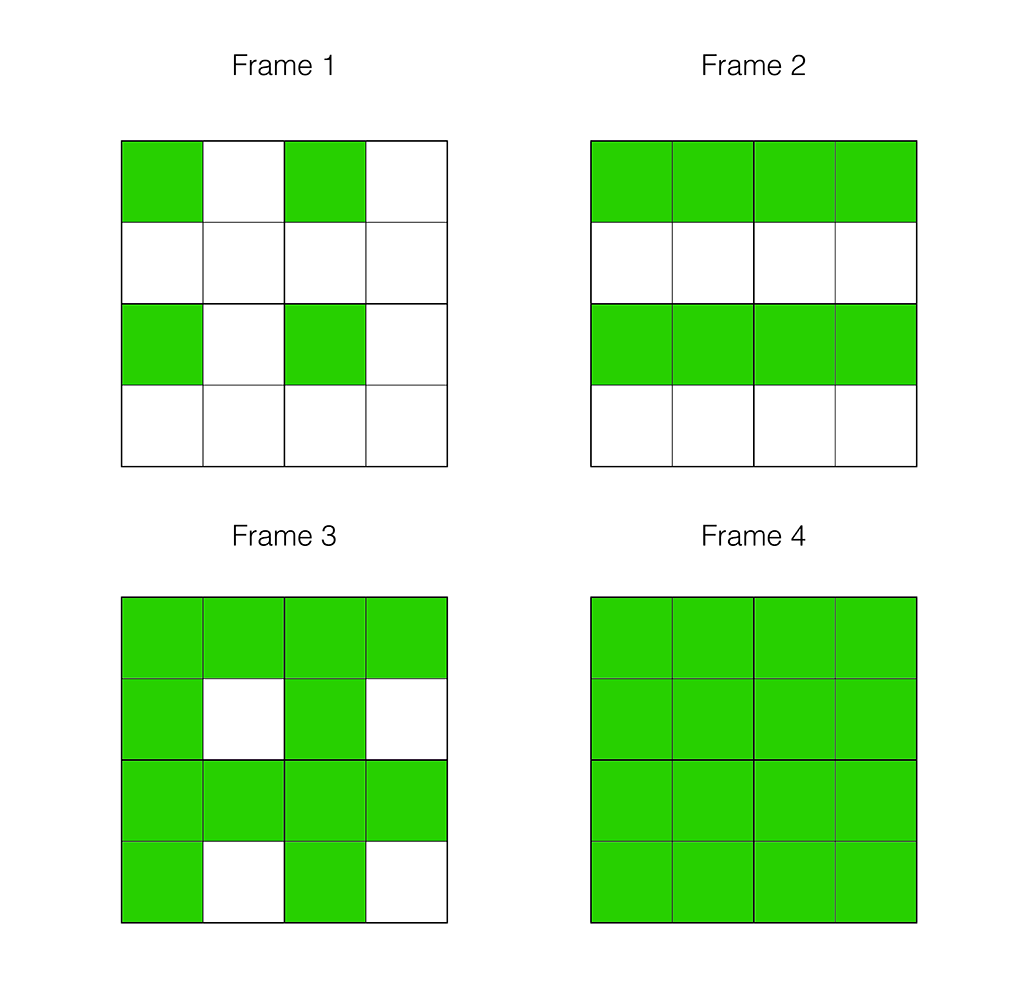
In movement, the old pixels are moved to where they should be on the current frame, based on their position in space and how much the camera moved from the last frame, this is called reprojection.
After moving the old pixels, their colour is validated against neighbouring new pixels, to minimize temporal artifacts, this is called neighbourhood clipping and is the foundation of modern temporal techniques like TAA.
Despite the neighbourhood clipping, we were still getting artifacts and issues after this stage in motion, due to the high number of “old” pixels compared to “new” pixels, typically this manifests itself as smearing or flickering. Our solution was to re-render the problematic areas separately at normal resolution, since these areas are only a small part of the final image.
This sounds great in theory, but while flying around clouds in a fairly heavy scenario we can see the following timings on a 2080 super at 1440p:
- Low-resolution rendering of new pixels: 5.45 ms
- Reproject old pixels and assemble full resolution image: 0.12 ms
- Re-rendering of problem areas: 4.11 ms
- Process and add clouds to the rest of the image: 0.09 ms
For perspective, if we want to reach 60 fps we need to render in ~16.6 ms, so this step seems to take a sizable chunk of rendering time in v0.1.5.0, even though we are rendering faster than we did in v0.1.4.0 using this approach.
This is because those re-rendered areas are at the edges of clouds where rays must travel furthest and evaluate the most samples before becoming opaque or reaching the boundary of the layer.
For v0.2.0.0 we took a bit more inspiration from temporal techniques to find an alternative solution to re-rendering problem areas: If colour-based neighbourhood clipping isn’t sufficient, we can use depth and motion information like speed and direction of movement (on-screen) to try and identify when reprojected pixels don’t belong to the same cloud surface/area and invalidate them as needed. The idea is to store all this information from the previous frame, and every frame we do a comparison with the previous one to get a probability that a reprojected pixel/colour does not belong to the same surface we are currently rendering.
After some implementation and tweaking this ended up working well and we can see the following improvement in rendering performance (screenshots taken on a 2080 super at 1440p, framerate counter in top left):
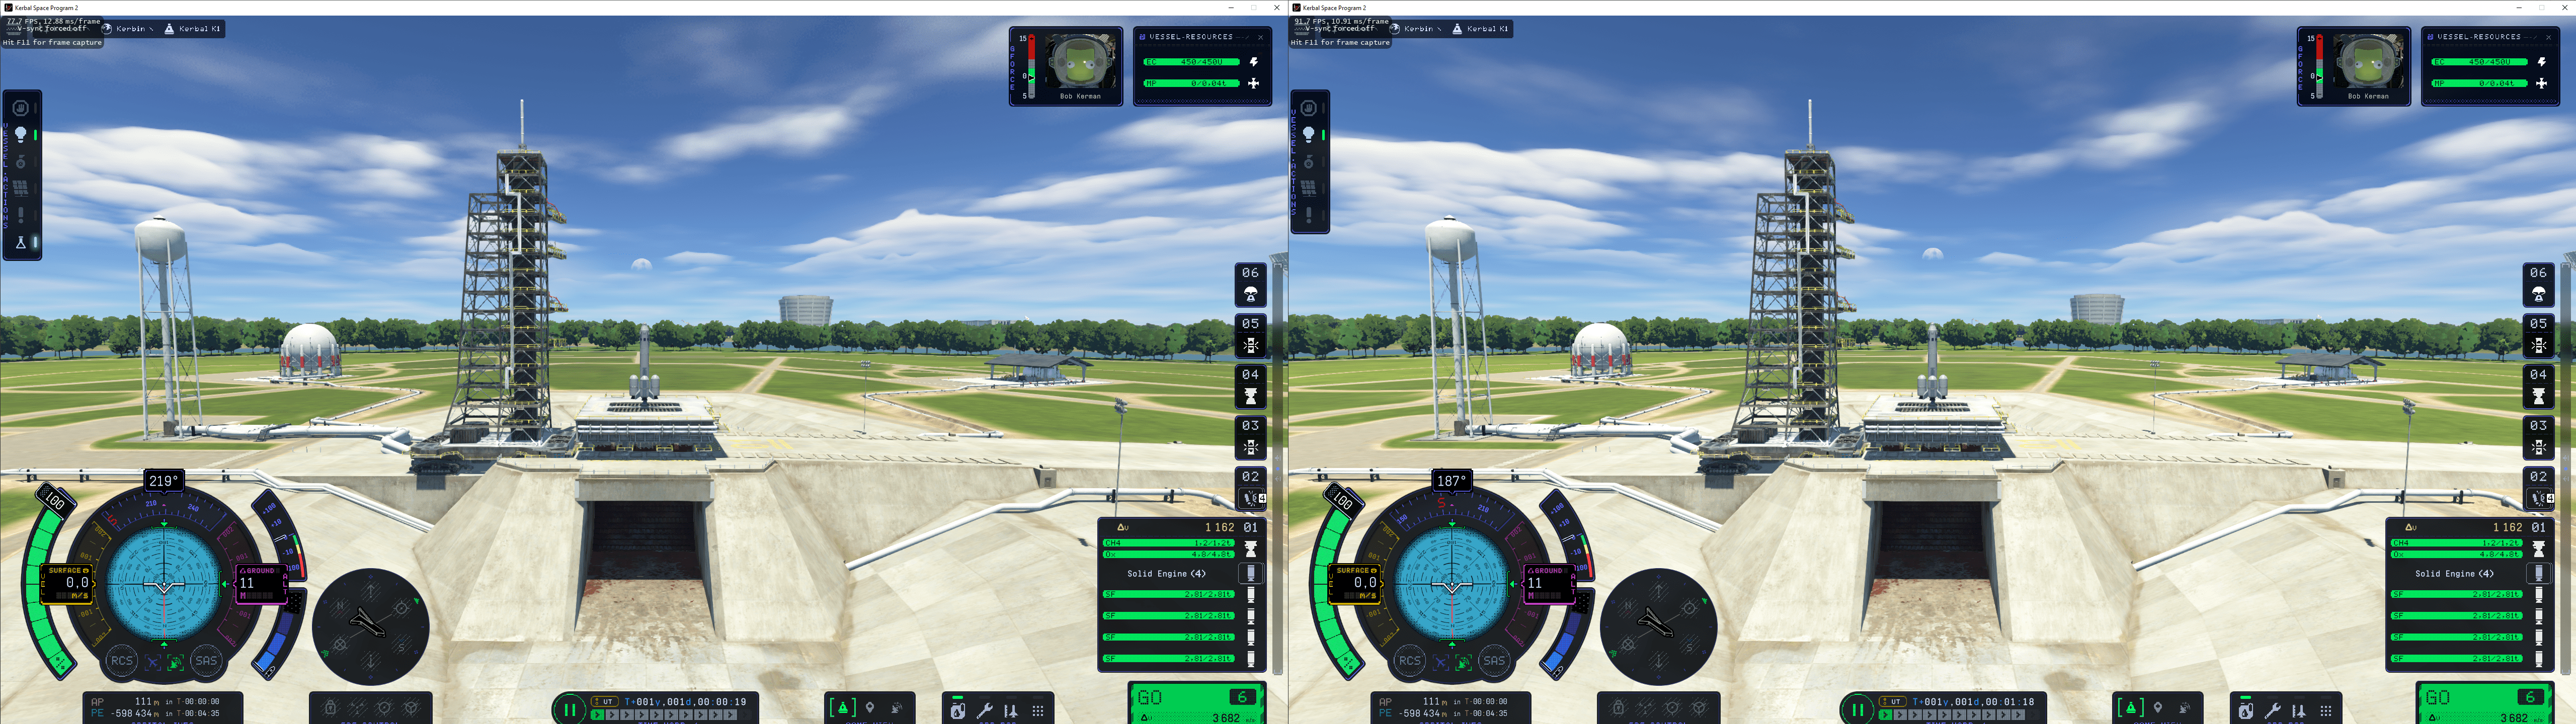
On the launchpad we went from 77 to 91 fps
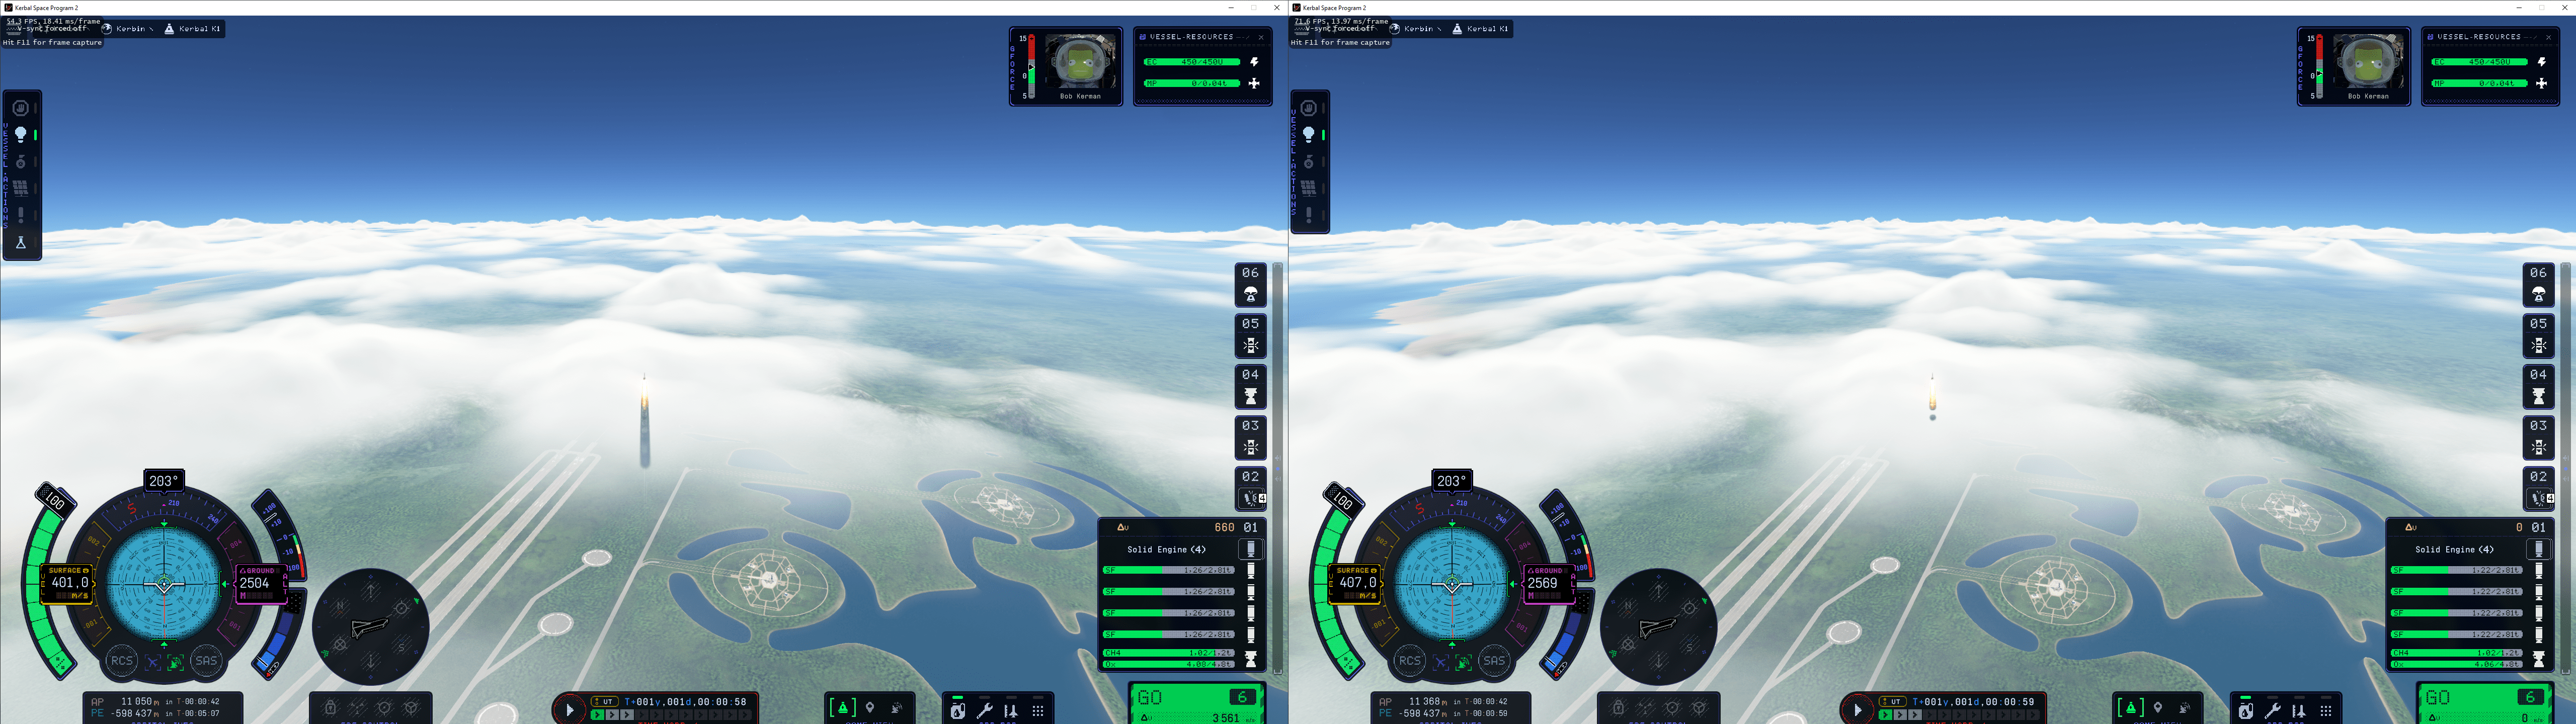
In-flight around the cloud layer, we went from 54 to 71 fps
That’s about a 17-31% performance improvement on the whole frame and we save 2 ms to 4 ms on the rendering of the clouds.
You can look forward to these performance improvements and more in v0.2.0.0, out on December 19th!
Keep up with all things Kerbal Space Program 🚀
KSP Forums
KSP Website
Facebook
Twitter
Instagram
Intercept Games Discord
KSP YouTube